Word count: 3083. Estimated reading time: 15 minutes.
- Summary:
- The first draft of General Arrangement (GA) drawings arrived from our Timber Frame Supplier, finally enabling forward progression in my house build. This starts the clock, and the Gantt chart can now be shown with some expectation of accuracy. Assuming no unpleasant surprises and sufficient cash flow, the outer walls should be up by February 2025, and it would be complete enough to move in before April 2025.
Sunday 30 June 2024: 22:05.
- Summary:
- The first draft of General Arrangement (GA) drawings arrived from our Timber Frame Supplier, finally enabling forward progression in my house build. This starts the clock, and the Gantt chart can now be shown with some expectation of accuracy. Assuming no unpleasant surprises and sufficient cash flow, the outer walls should be up by February 2025, and it would be complete enough to move in before April 2025.

You will need to click and zoom in on that to make it readable, however upshot is that assuming no unpleasant surprises and that there is sufficient cash flow to maximally parallelise jobs, the outer walls should be up by the start of February 2025 and it would be complete enough to move in before April 2025. The former I think possibly achievable, the latter I do not as I think cash flow will become a serious issue around then especially as we cannot connect sewerage until the outhouse foundations and walls are erected as a minimum. The building will be weather proof, so it now becomes a question of time. We shall cross that bridge when we come to it.
I expect getting the GA and Structural Engineering (SE) drawings to final sign off will consume a great deal of my free time next few weeks. I also will need to start various balls rolling in terms of getting workers and supplies and indeed the mortgage in place by the various due dates. A long eighteen months beckons before us.
Anyway, on a lighter note, the last four weeks saw me continue to horse through backlogged todo items. All sorts of things the parts for which had been bought, tested to make sure they worked and then shelved until more free time appeared have seen completion. Some of these backlogged items were as much as two years old!
9.5v DC power supply fan fix
The first thing I got done wasn’t actually backlogged, but it did take six months to complete as my first approach to doing it didn’t work out, so I had to wait for a second round of parts from Aliexpress. You may remember from last year that the downlights in the house will run from a 9.5v DC power supply, as that had been empirically tested to produce far less heat which will greatly lengthen the lifetime of those very cheap bulbs. It made no sense to downconvert that from the 54v DC mains, it isn’t as efficient as a dedicated three phase to DC power converter. As I only needed a few hundred watts, you can’t actually get three phase AC input supplies for such a low wattage, but you can get two phase supplies. This is one such also from Aliexpress:
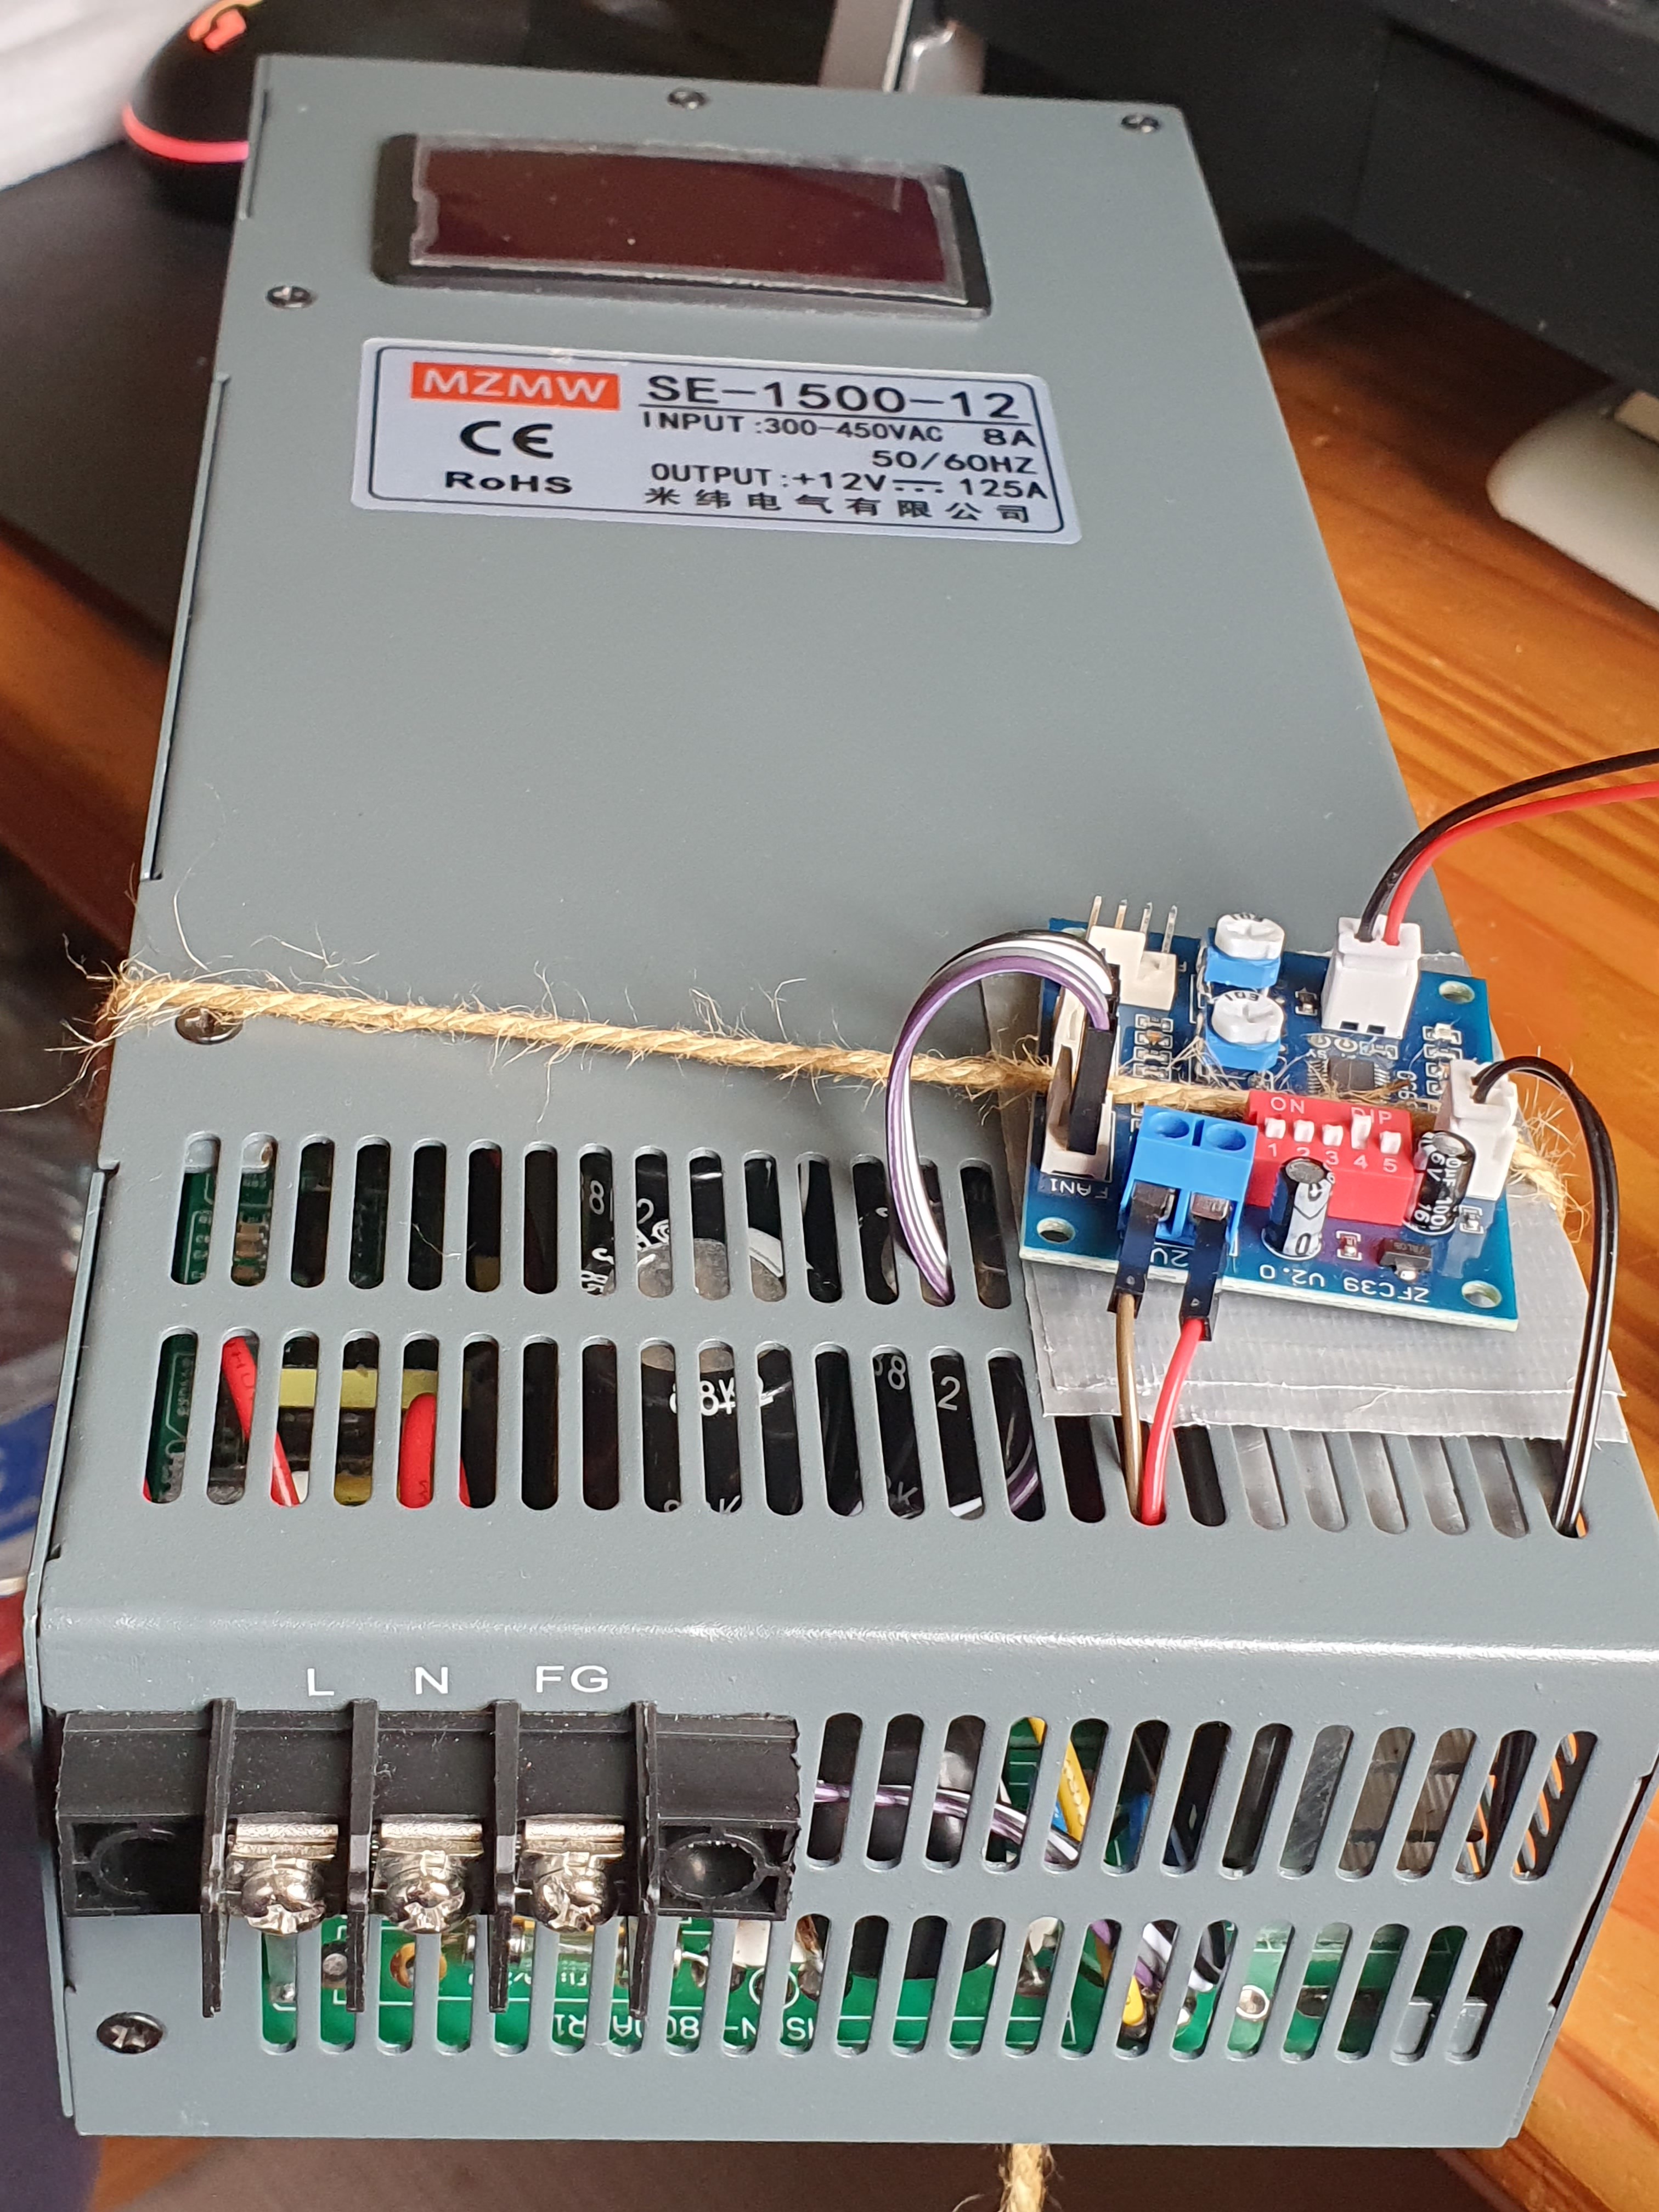
As you can see, I have attached an additional board using twine  .
I’ve been generally impressed with the power supplies I’ve received off
Aliexpress, for one quarter the cost of a European made power supply
they’re worth buying two of them as a backup and you still save half
the cost overall. The build quality isn’t quite to European levels, but
at one half the cost with a redundancy, that’s very acceptable. And it’s not like the build
quality is bad, not at all, it’s just they cut corners on little things
to get the cost down such as in this case, the cooling fan which goes
at 100% all the time. To fix this, I added via twine a PWM fan controller
and replaced the fan with a variable speed one, total cost under €20
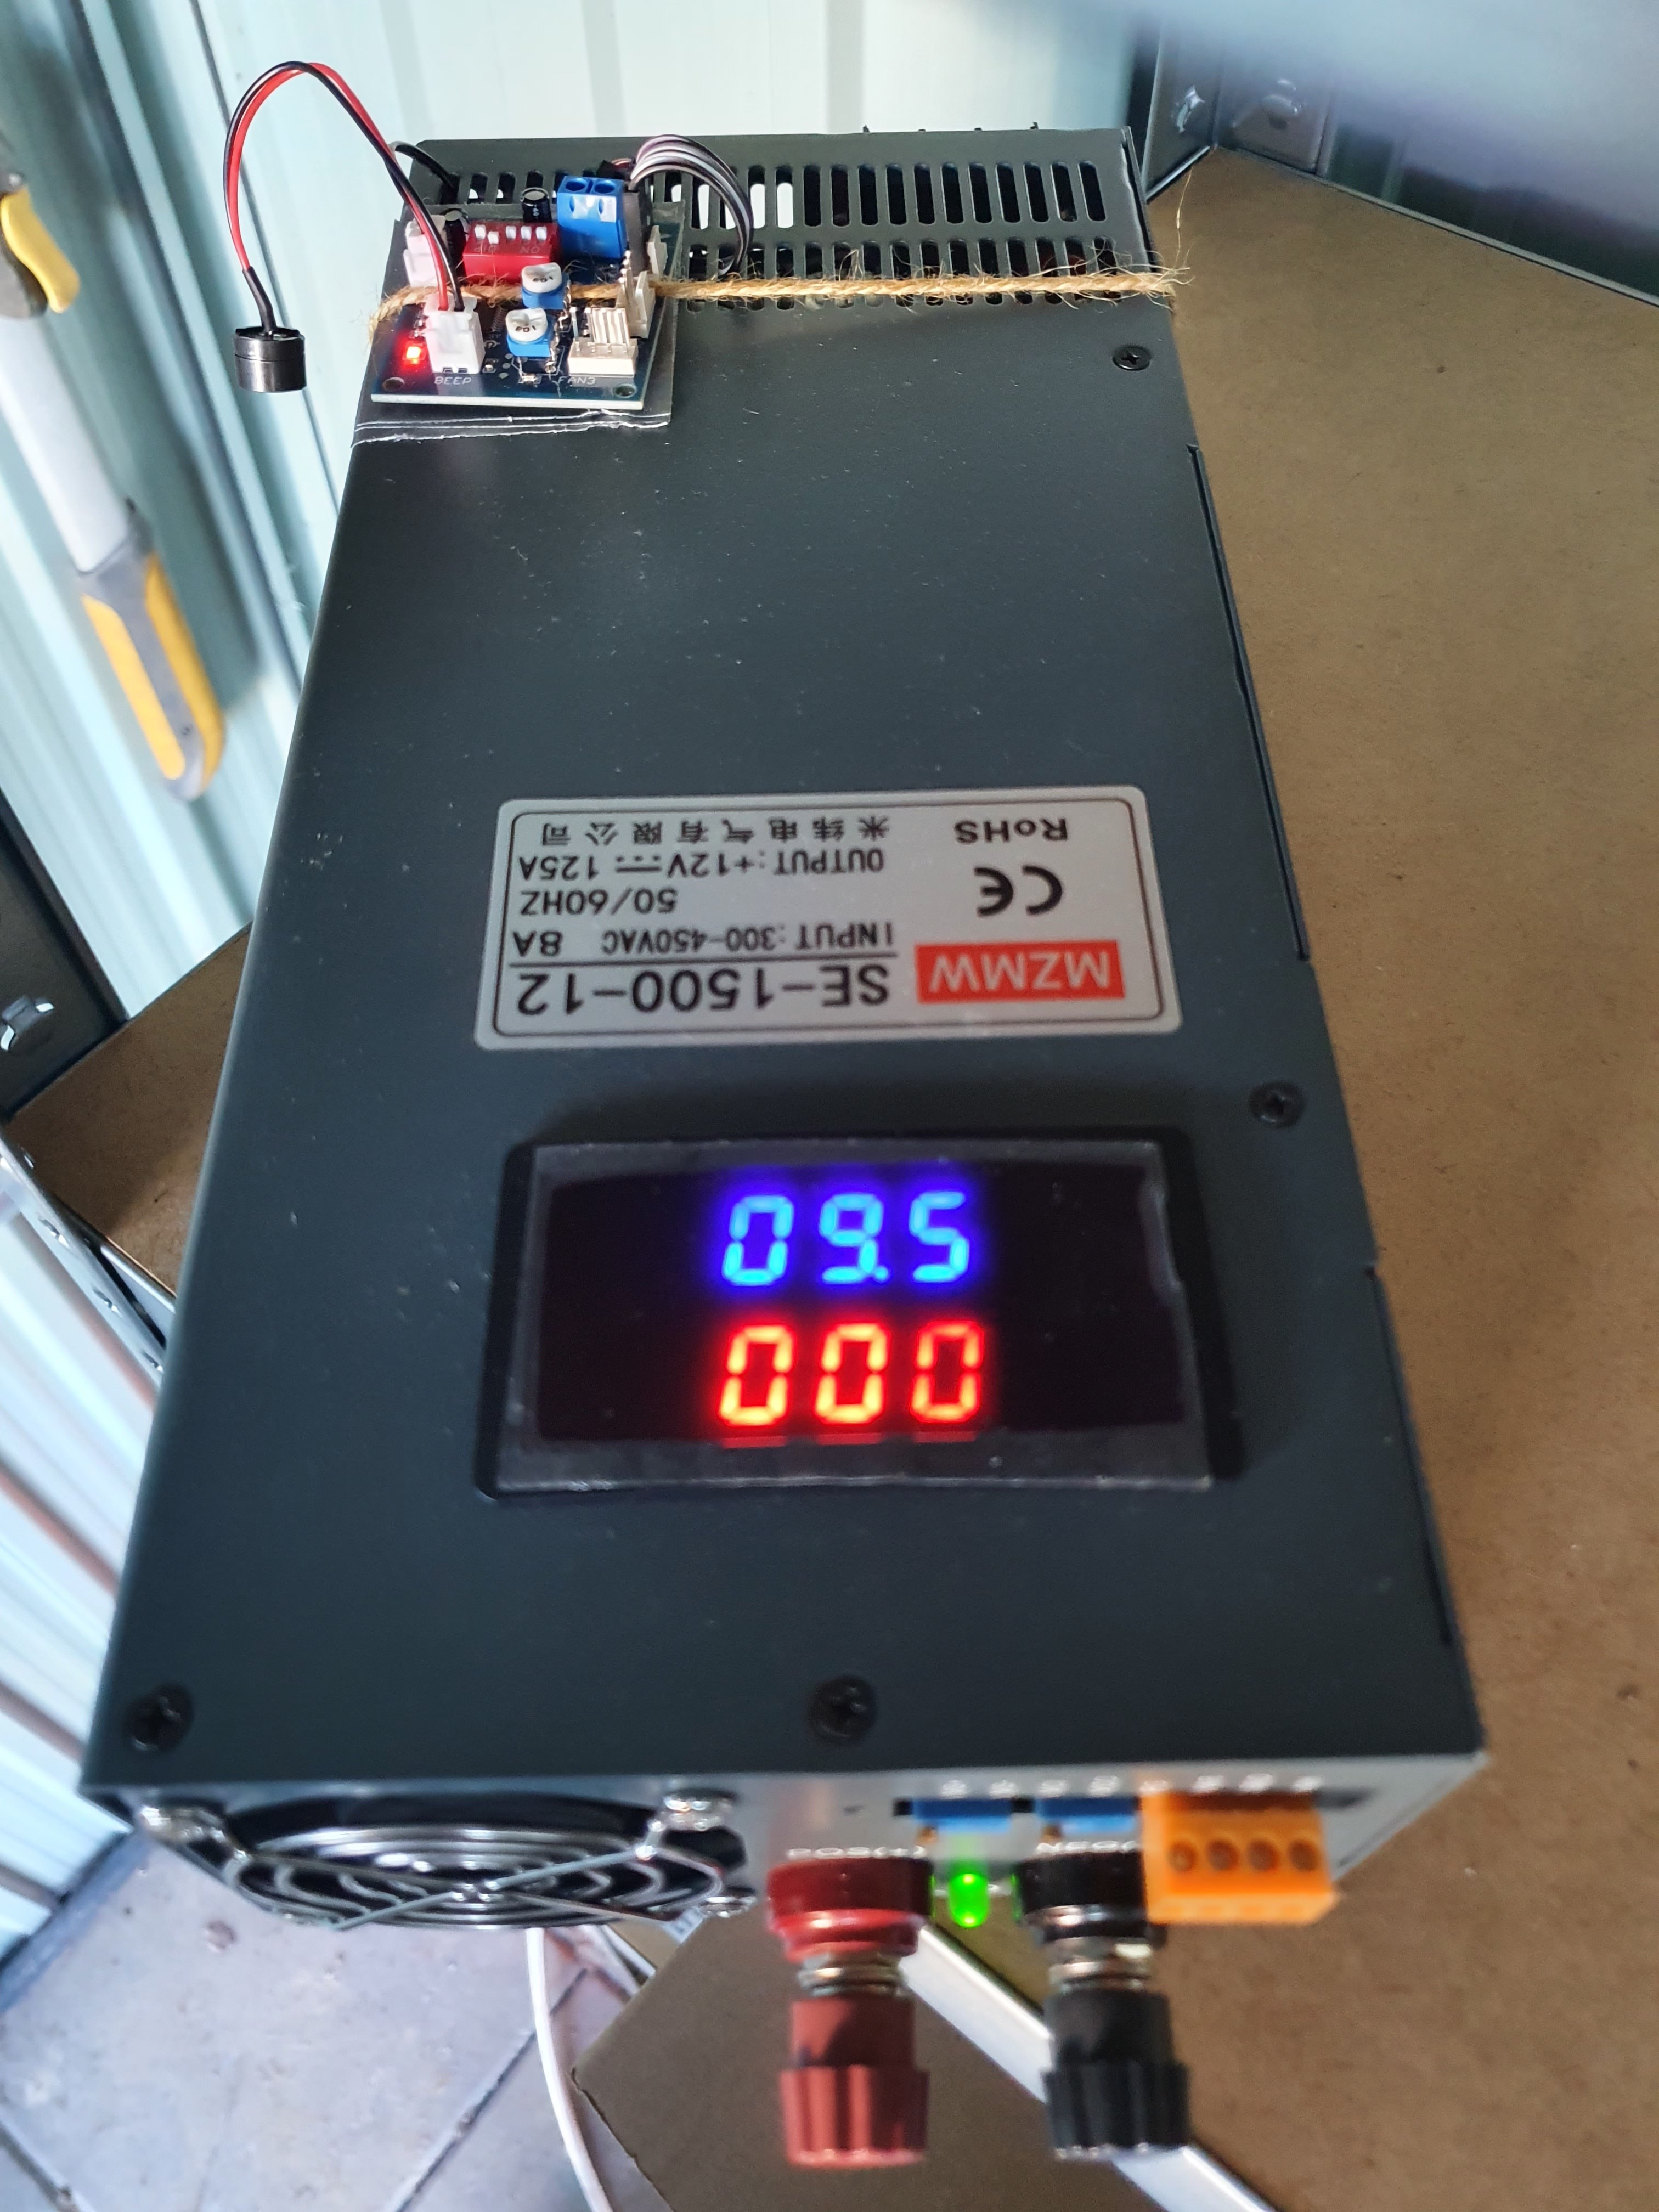
including delivery. And it works a treat, the fan spins slowly at low
loads and spins up nicely as the power supply’s heatsink passes 40 C.
The conversion efficiency on this one appears to be not as good as the
big 54v power supply, I make it around 80-85%, whereas the big supply
definitely hits 90% efficient despite me loading it by only five percent.
I assume the two phase
input is naturally less power efficient than three phase. Still, for
the money and given my electricity will always be free of cost, I don’t
really care.
.
I’ve been generally impressed with the power supplies I’ve received off
Aliexpress, for one quarter the cost of a European made power supply
they’re worth buying two of them as a backup and you still save half
the cost overall. The build quality isn’t quite to European levels, but
at one half the cost with a redundancy, that’s very acceptable. And it’s not like the build
quality is bad, not at all, it’s just they cut corners on little things
to get the cost down such as in this case, the cooling fan which goes
at 100% all the time. To fix this, I added via twine a PWM fan controller
and replaced the fan with a variable speed one, total cost under €20
including delivery. And it works a treat, the fan spins slowly at low
loads and spins up nicely as the power supply’s heatsink passes 40 C.
The conversion efficiency on this one appears to be not as good as the
big 54v power supply, I make it around 80-85%, whereas the big supply
definitely hits 90% efficient despite me loading it by only five percent.
I assume the two phase
input is naturally less power efficient than three phase. Still, for
the money and given my electricity will always be free of cost, I don’t
really care.
(I originally thought that the fan controller could PWM a dumb fan, but it turns out it doesn’t have the resolution nor the smarts, which the Chinglish item description did not make clear. In the end, there was no rush on this and I could afford to wait six more weeks for the right kind of replacement fan).
100w vaulted ceiling floodlights
In the lighting plan, we need to provide a baseline lighting of the ceiling, which is a large volume of space. Said plan envisaged two 100w 3000K industrial flood lights and two 100w 4000K industrial flood lights, each individually switchable. You could thus have daylight, warm white, middle road between the two in four possible brightnesses.
The 4000K colour temperature of the 100w floodlight is rarely in stock, so when it came into stock I snapped up two as they are hard to find otherwise. The 200w model gets up to 67 C which had worried me for indoor use, thankfully the 100w models are much tamer despite having much smaller heatsinks:
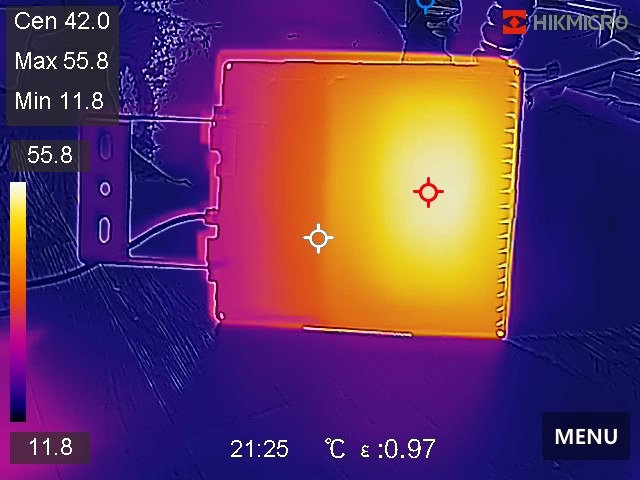
56 C I think will do just fine. These flood lights have a double duty, they will be put onto long extension cables so they are highly mobile around the inside of the house after the frames are erected. You can thus position them wherever you need them to be which will be a real boon for working inside the house during winter. Once the inside wiring gets done, they’ll get mounted into their final places.
Commercially printed house model
Last month I mentioned that I had sent off my house model to be printed commercially by a Prusa XL in ABS at 1:62 scale. There was a problem – the roof printed poorly on my printer, but disasterously on their much higher resolution printer. They very kindly allowed me to manually remesh the roof and send the fixed top part. The results came out lovely:
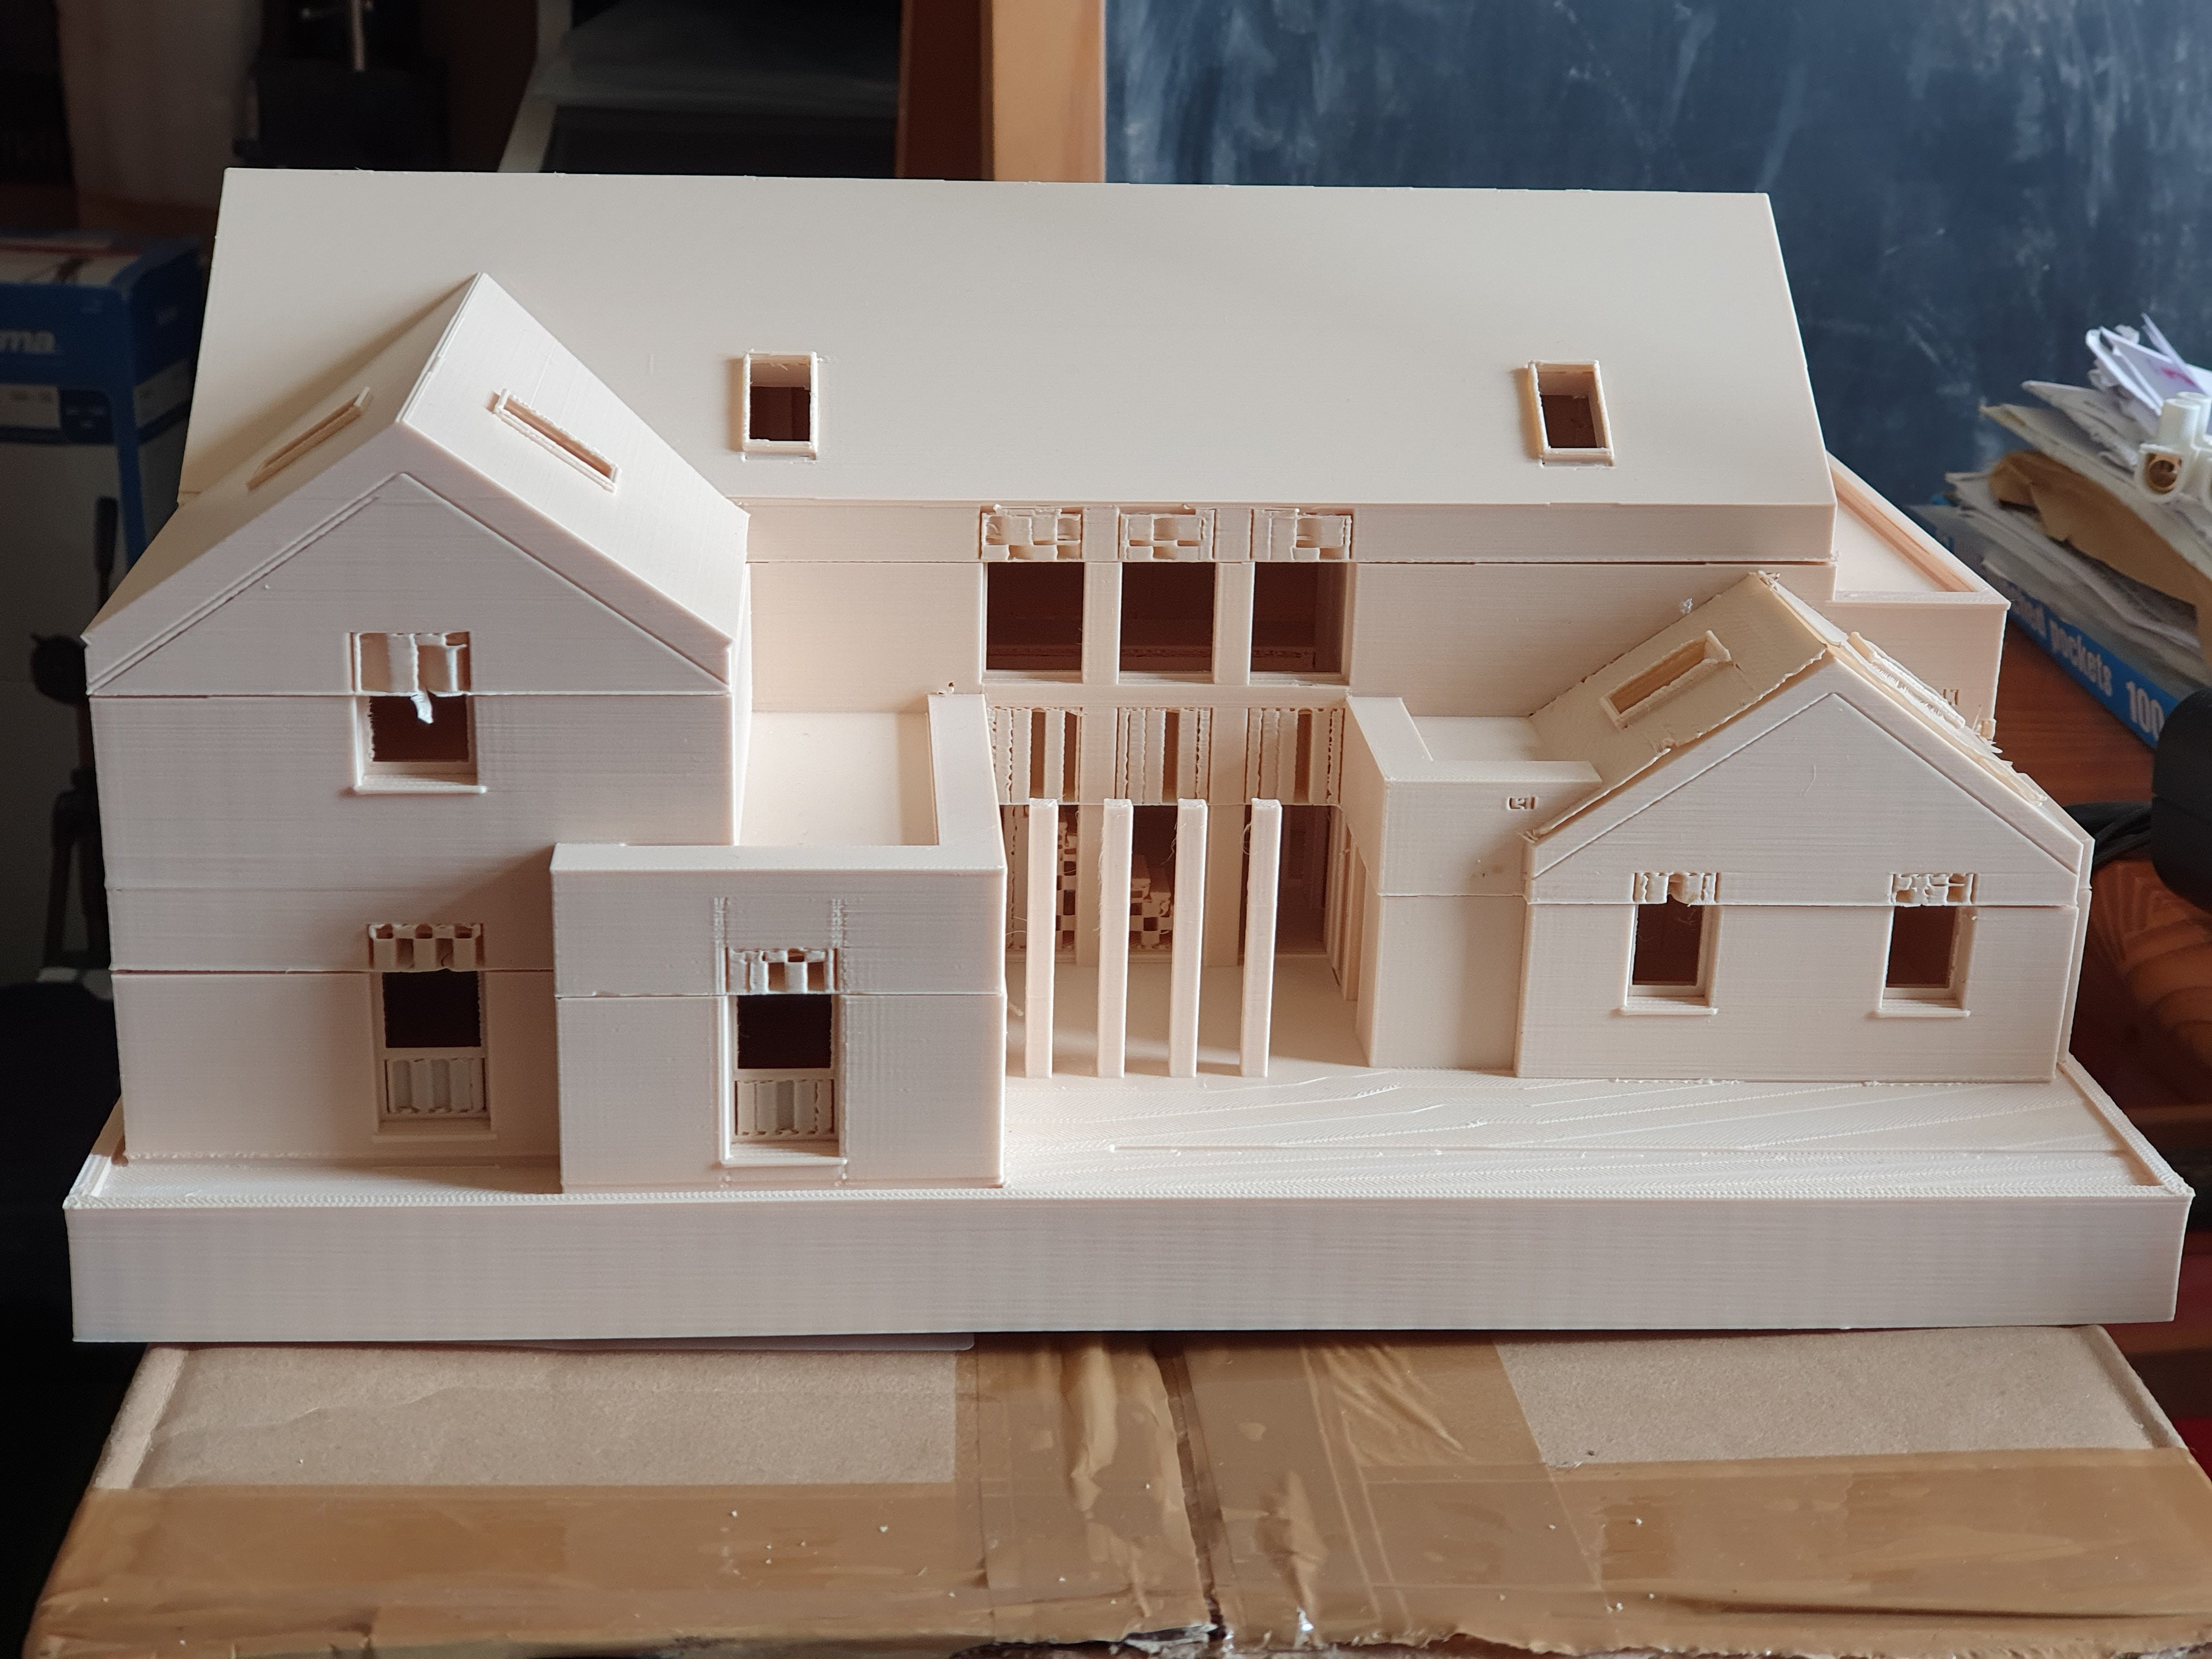
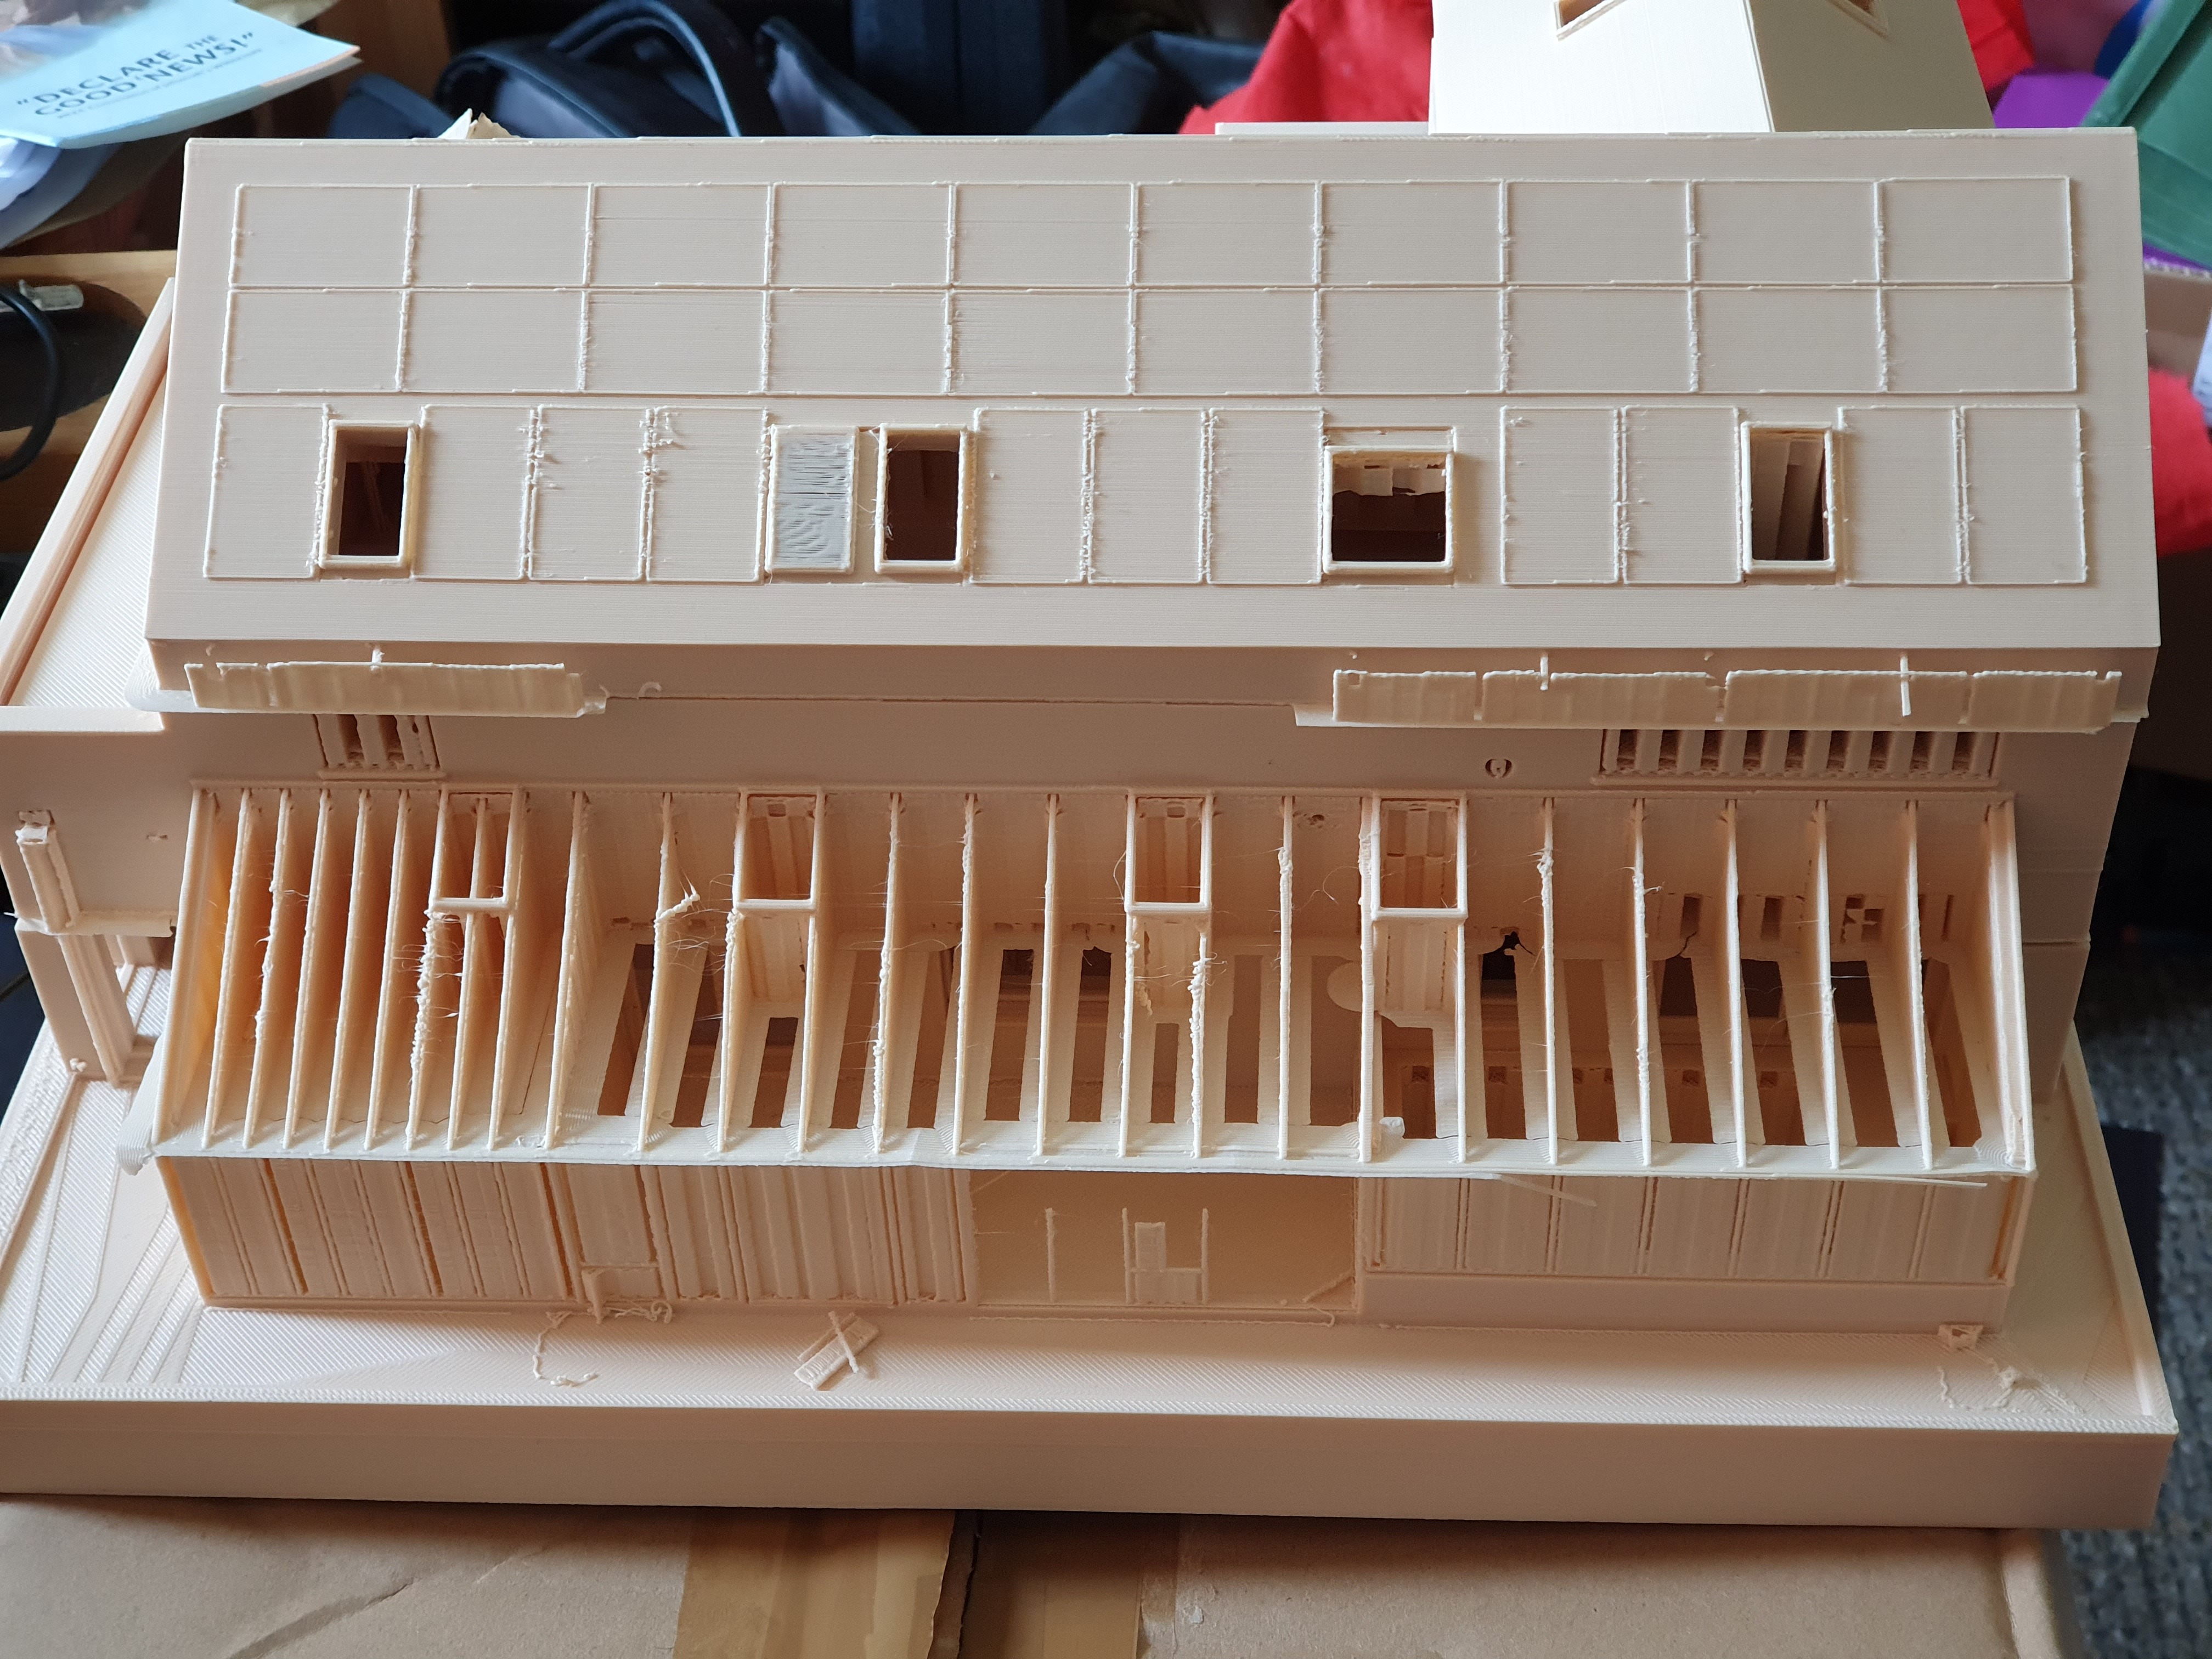
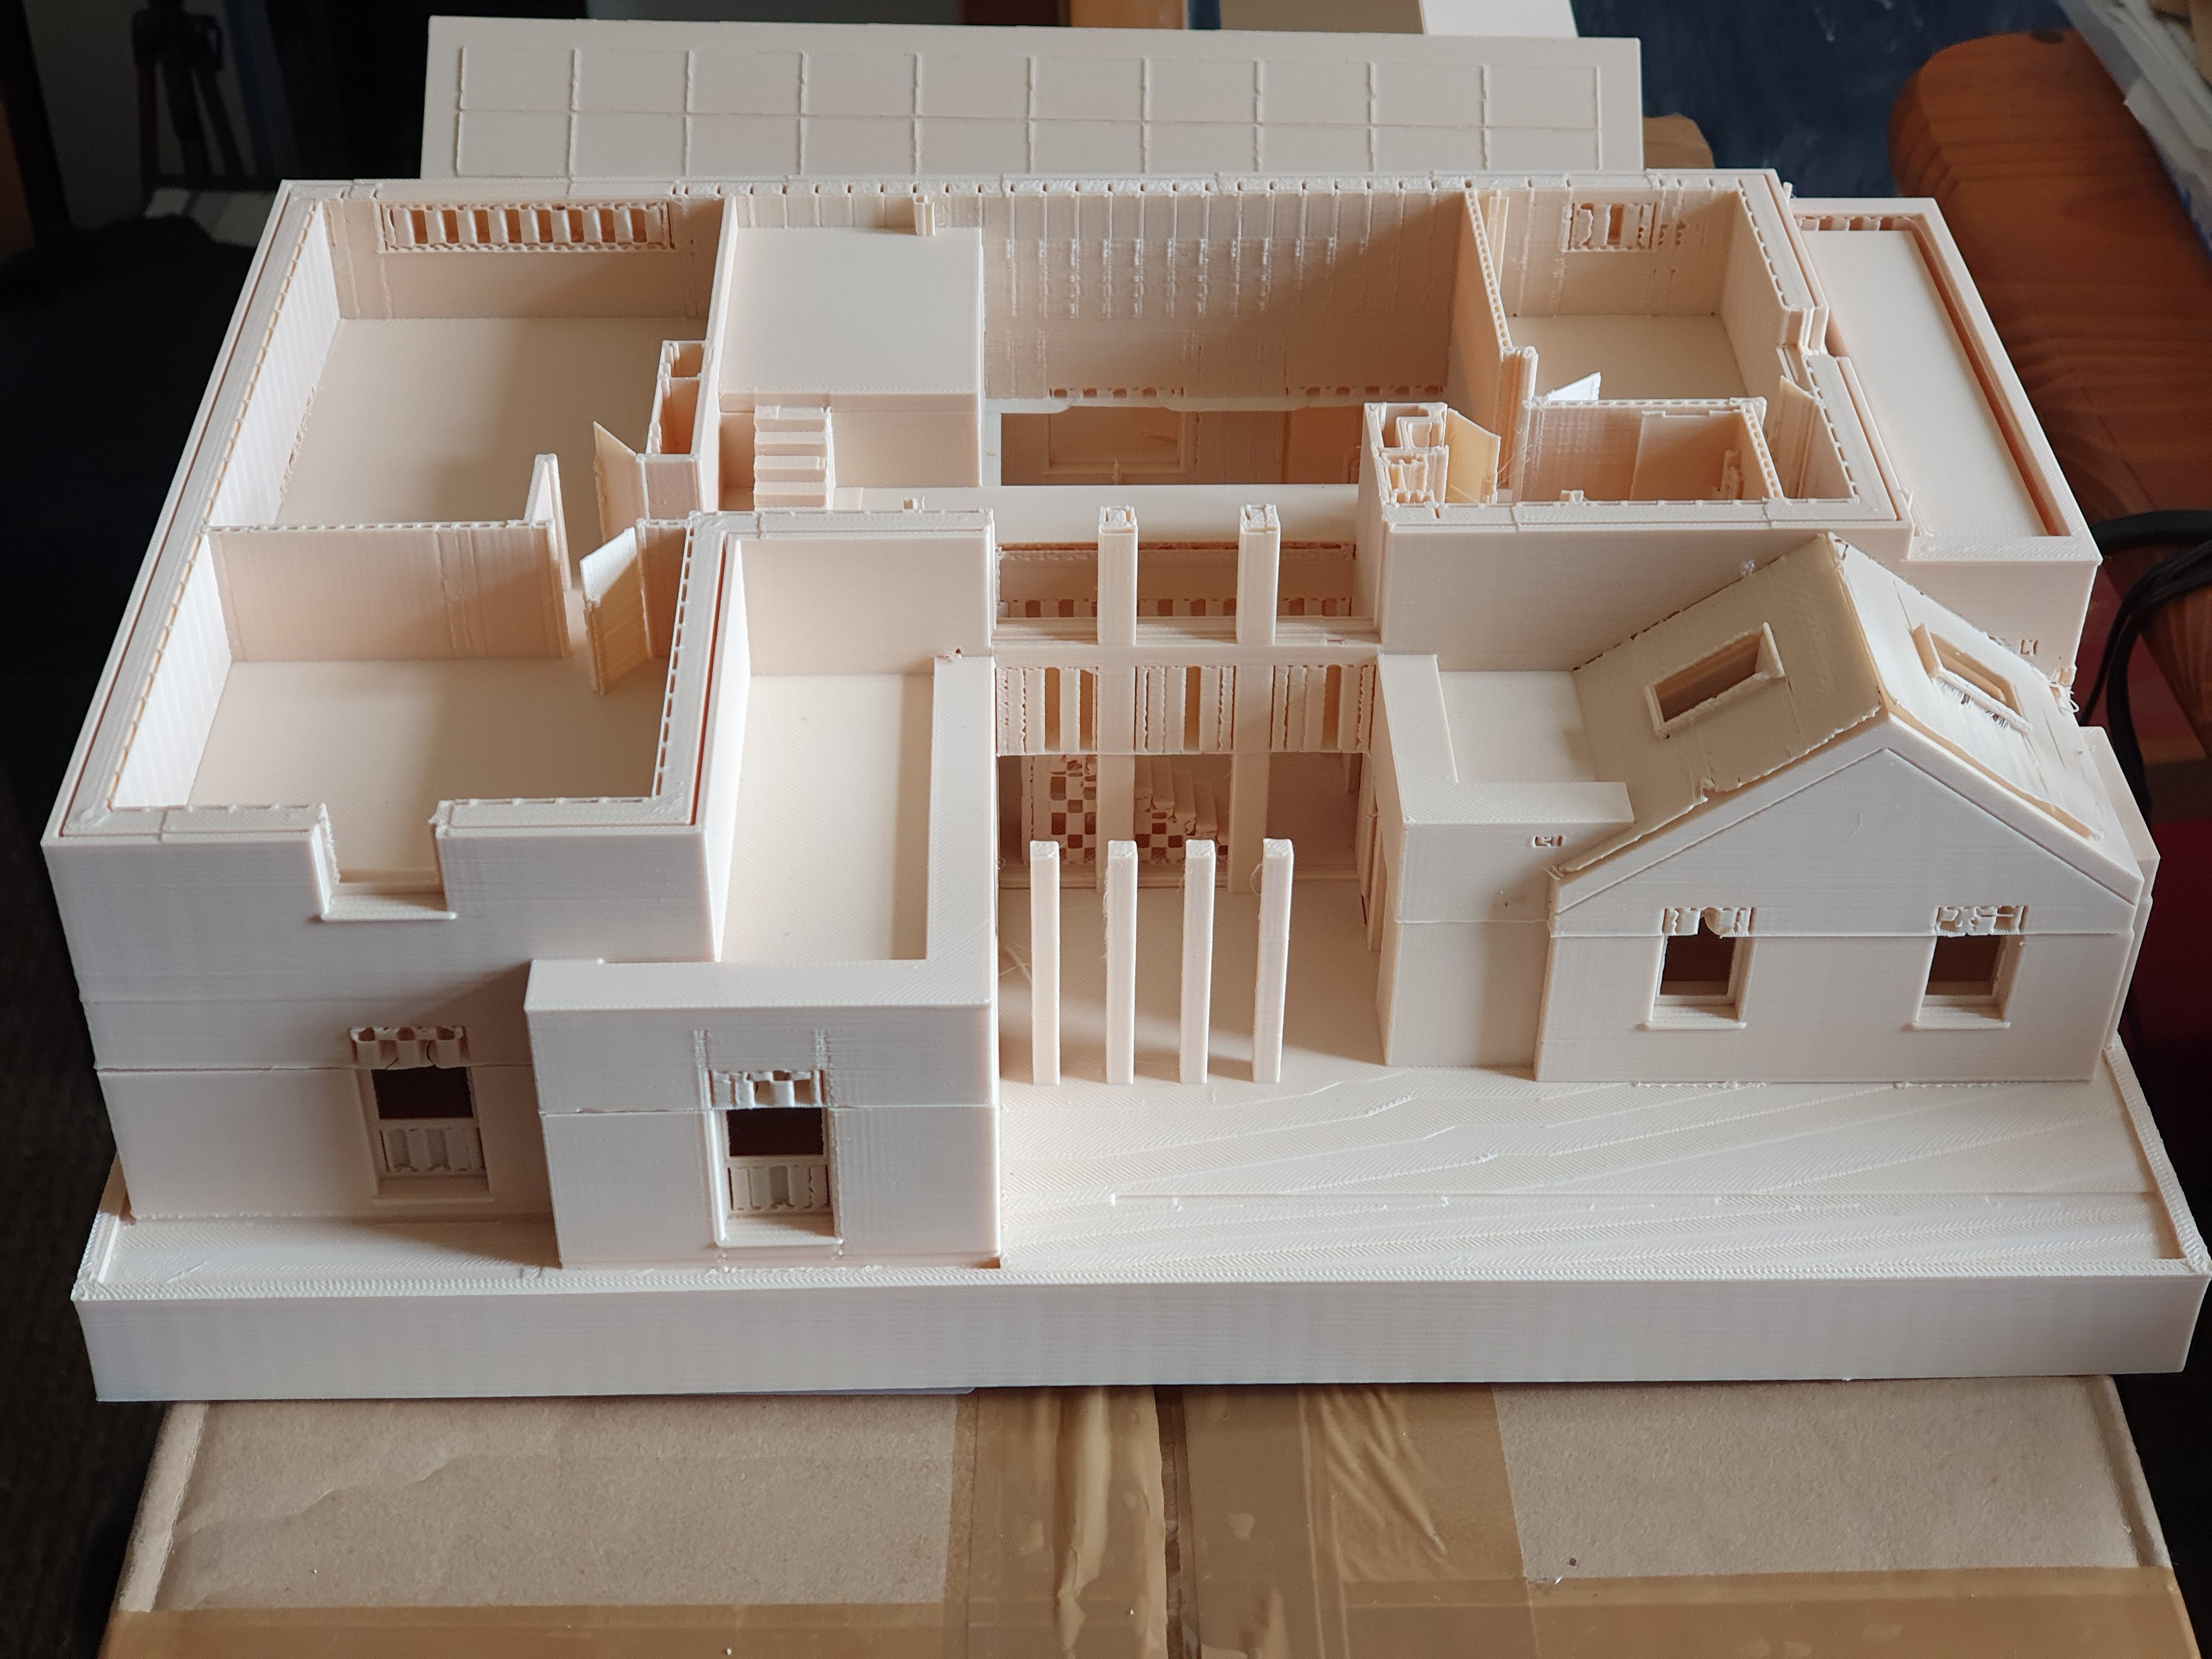
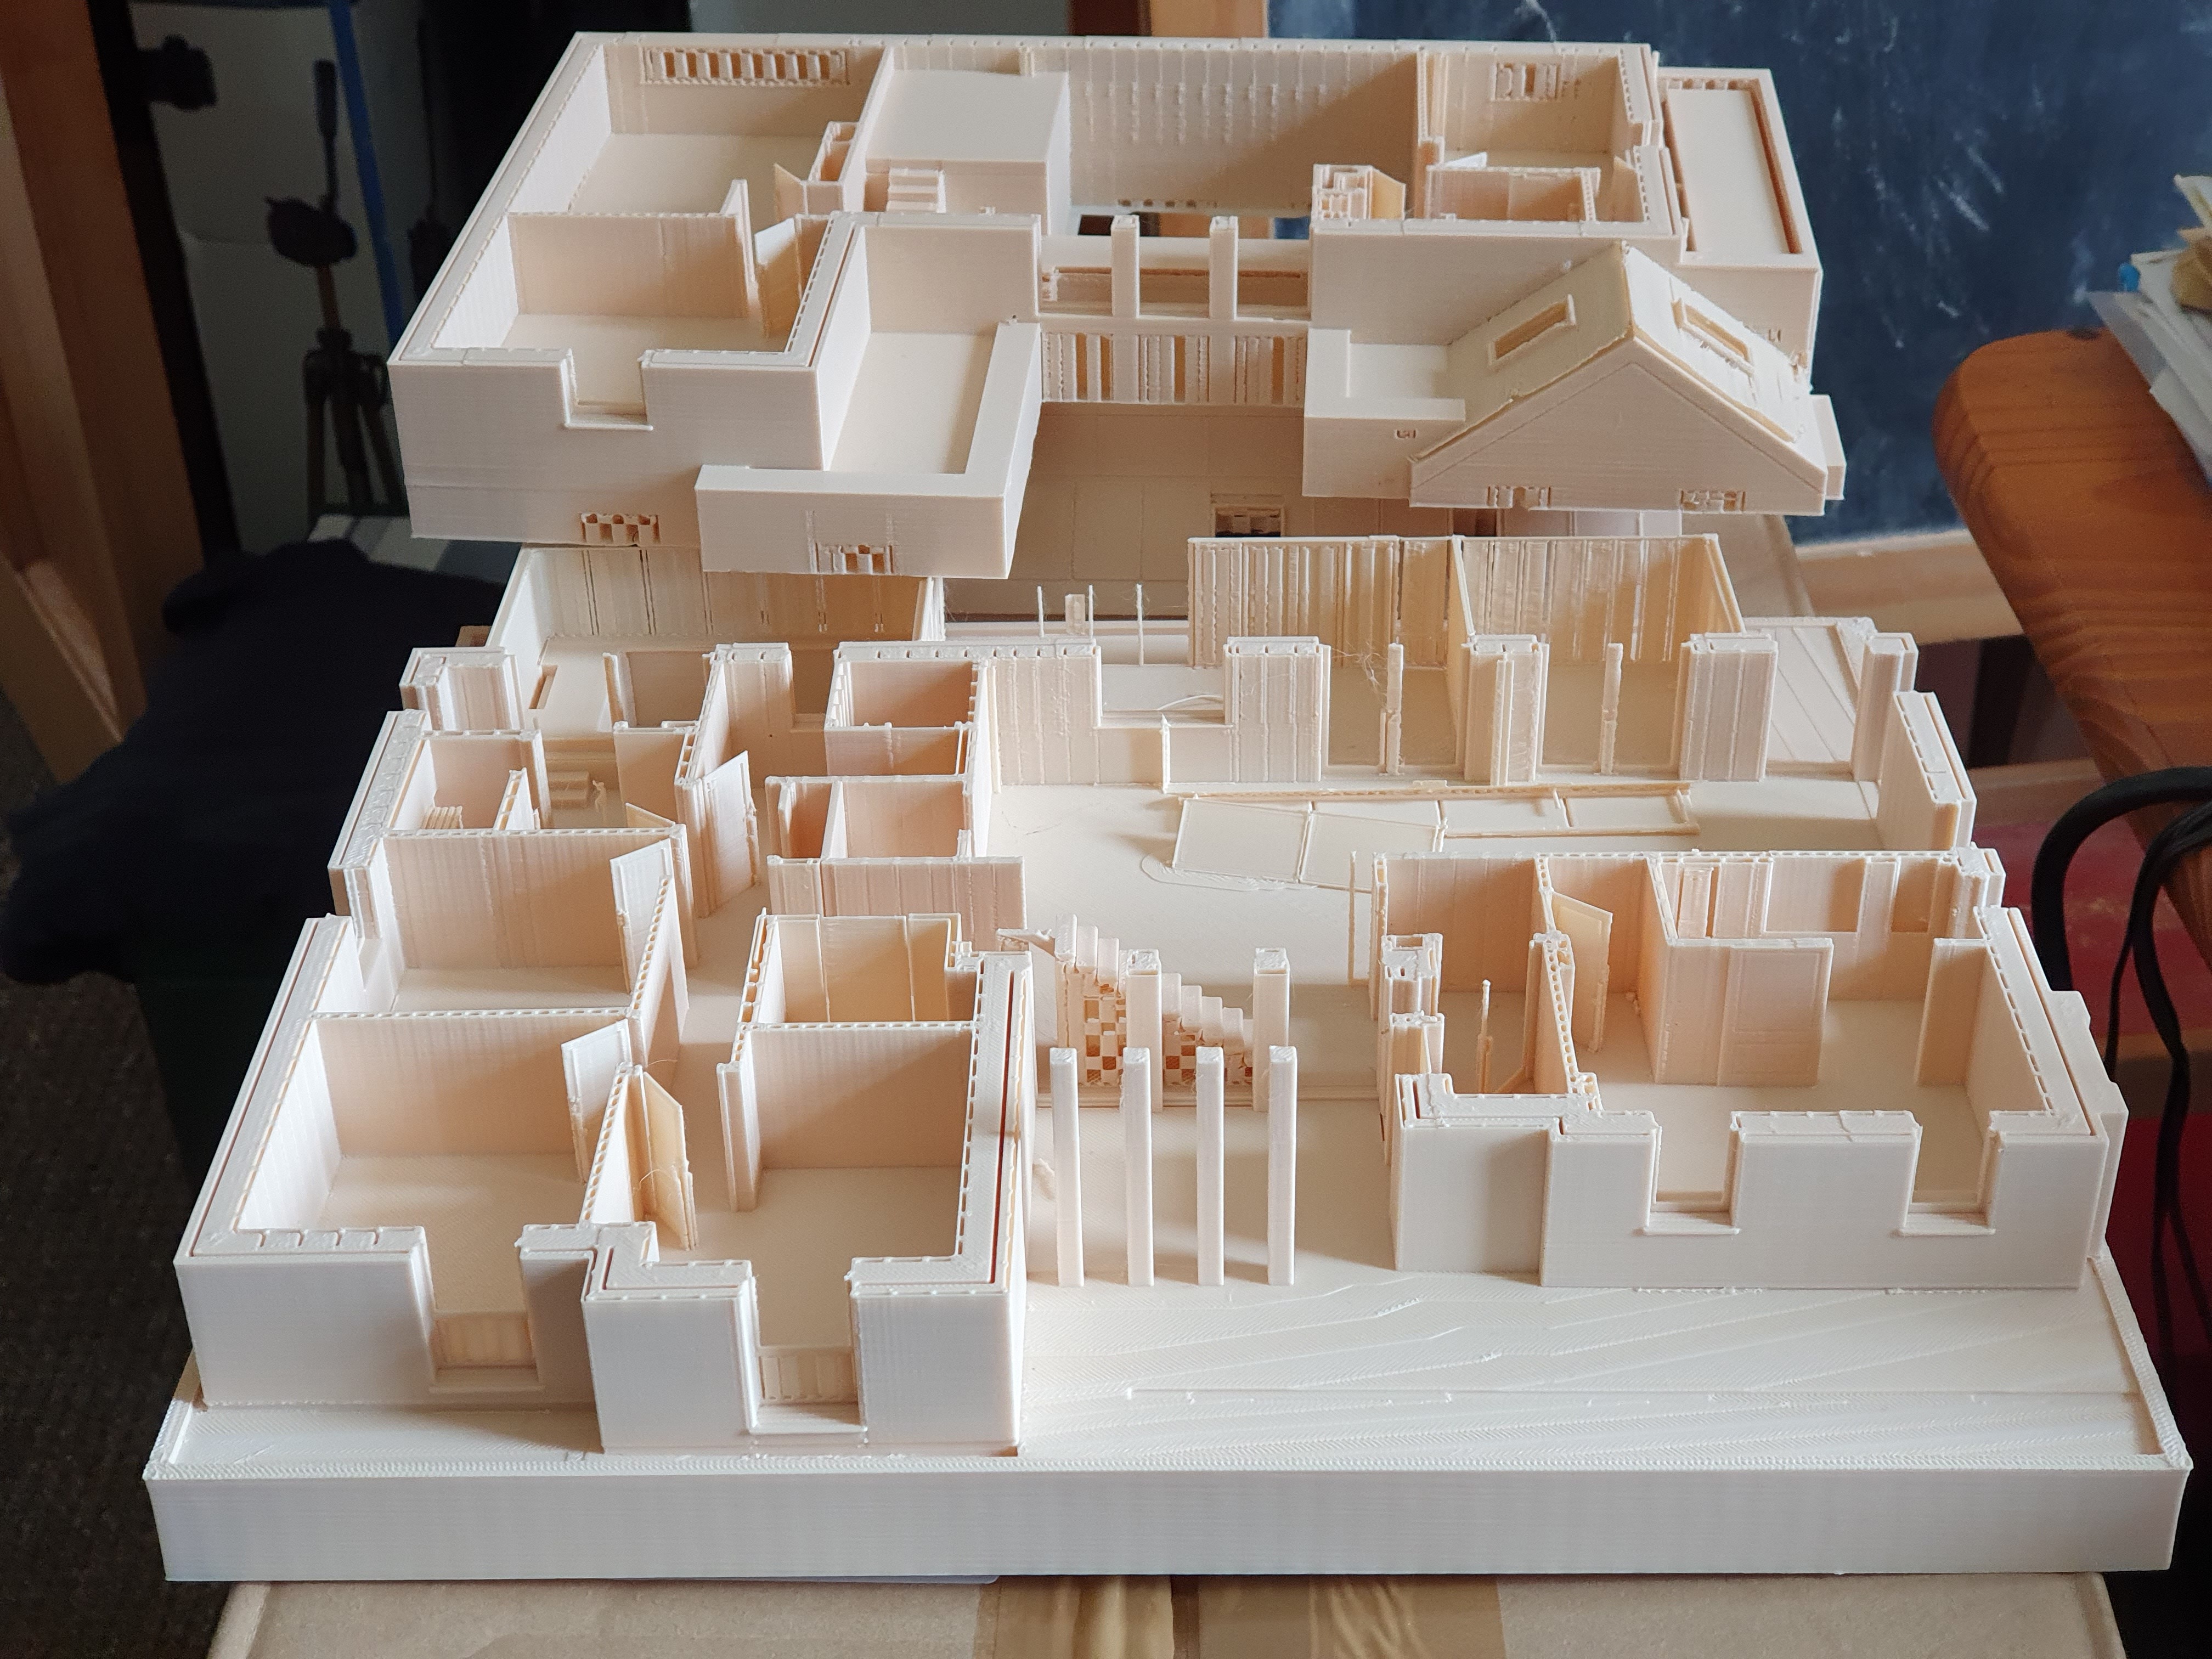
This was printed to the maximum that the Prusa XL can do, 320 mm width using ivory coloured ASA plastic. It came out really nice, the added detail is amazing. I have yet to remove the supports using a sharp knife, I am somewhat not in a hurry because I need to retain the removed plastic to create a ‘plastic slurry’ by dissolving it in acetone. It’s certainly a weekend of work, and I think I’d prefer to do that all at once in a single shot.
I have ordered from Aliexpress LED panels so the inside can be illuminated, and I intend to mount the three parts vertically separated using transparent cake stands. The entire lot will go inside a custom made display case, which I have ordered after much humming and hawing about which online vendor to choose. I expect to mount it in the house where I will be mounting the plans, the history of the evolution of the design, and so on.
When all the bits arrive, if a weekend of time appears, I’ll get it all cut out, slurry paste applied where it is needed, wired up and mounted and then put away into storage. Or, I might kick it into the long touch as well and not get back to it for two years. Depends on what the next eighteen months will be like.
Network connected 3D printer
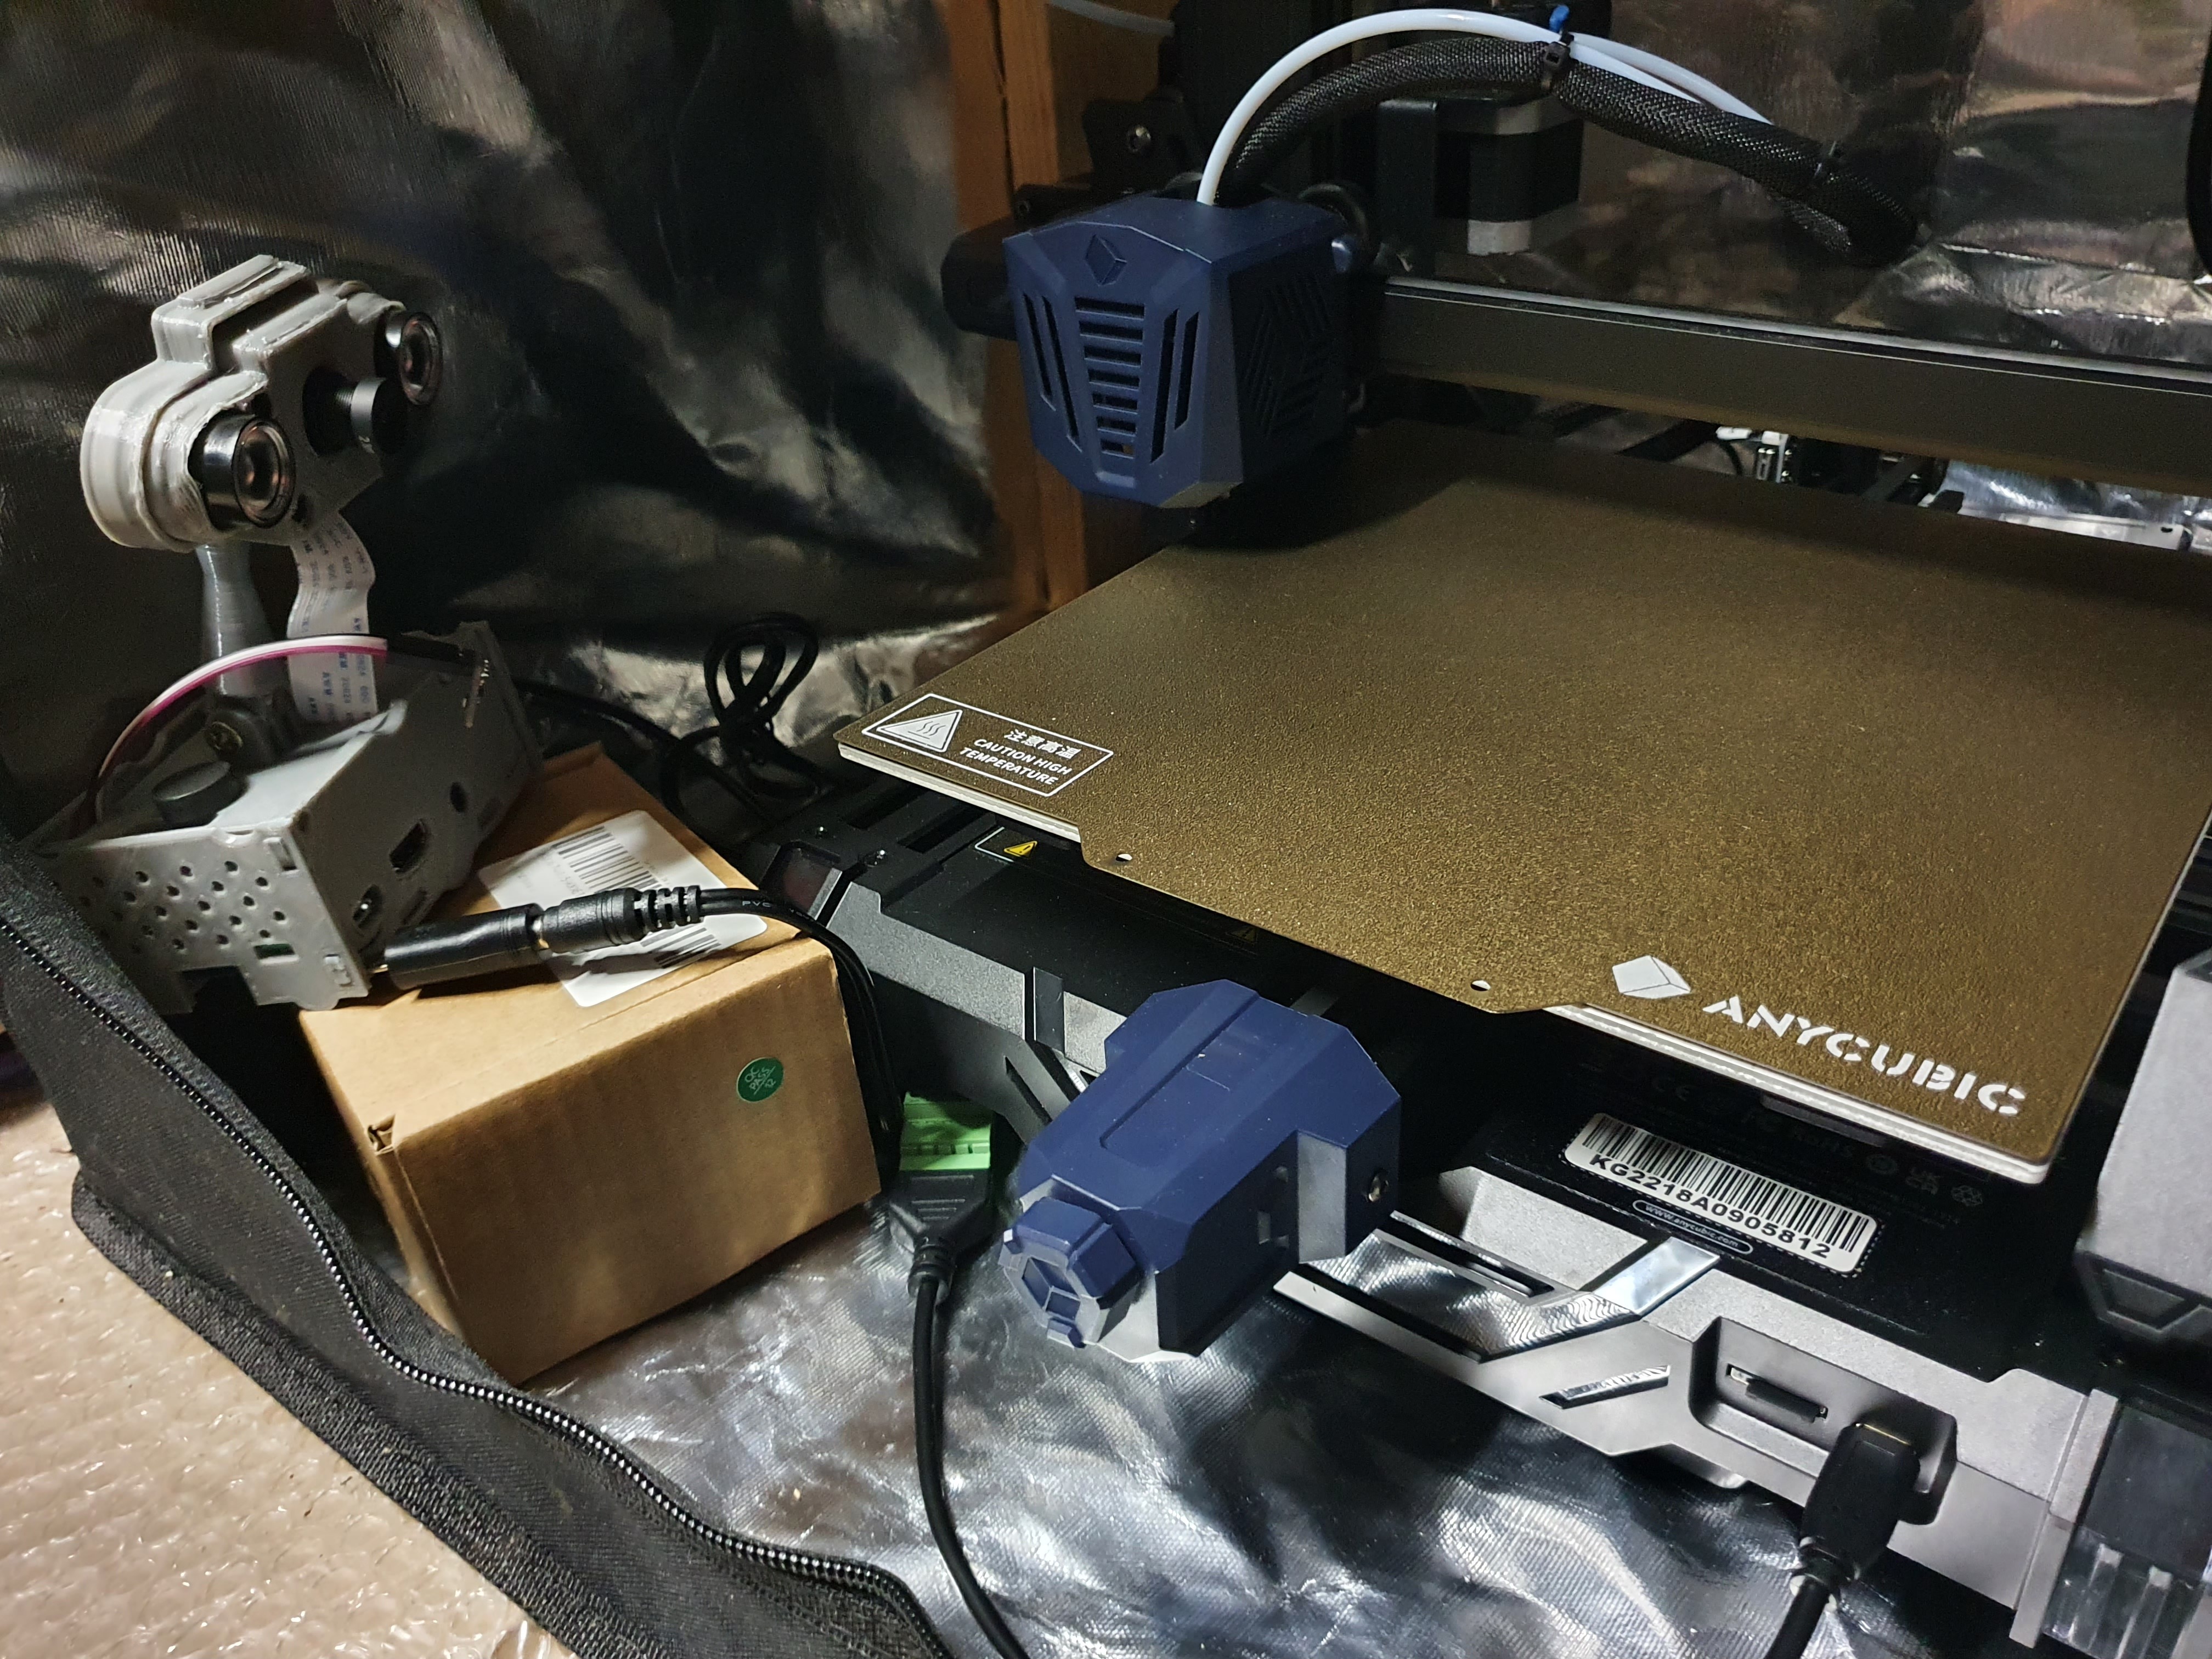
I keep mentioned the two years ago thing because when I bought my Anycubic Kobra Go 3D printer two years ago, my original intent was to connect it to Wifi via a dedicated Raspberry Pi so it could be operated and monitored remotely using my phone rather than me having to physically go check it every few hours to make sure nothing has gone wrong. I bought all the parts at the time including the then very scarce Raspberry Pi Model 3A+, but never got back to it.
Well now not only did I get back to it, but I completed it! Here is my new setup:
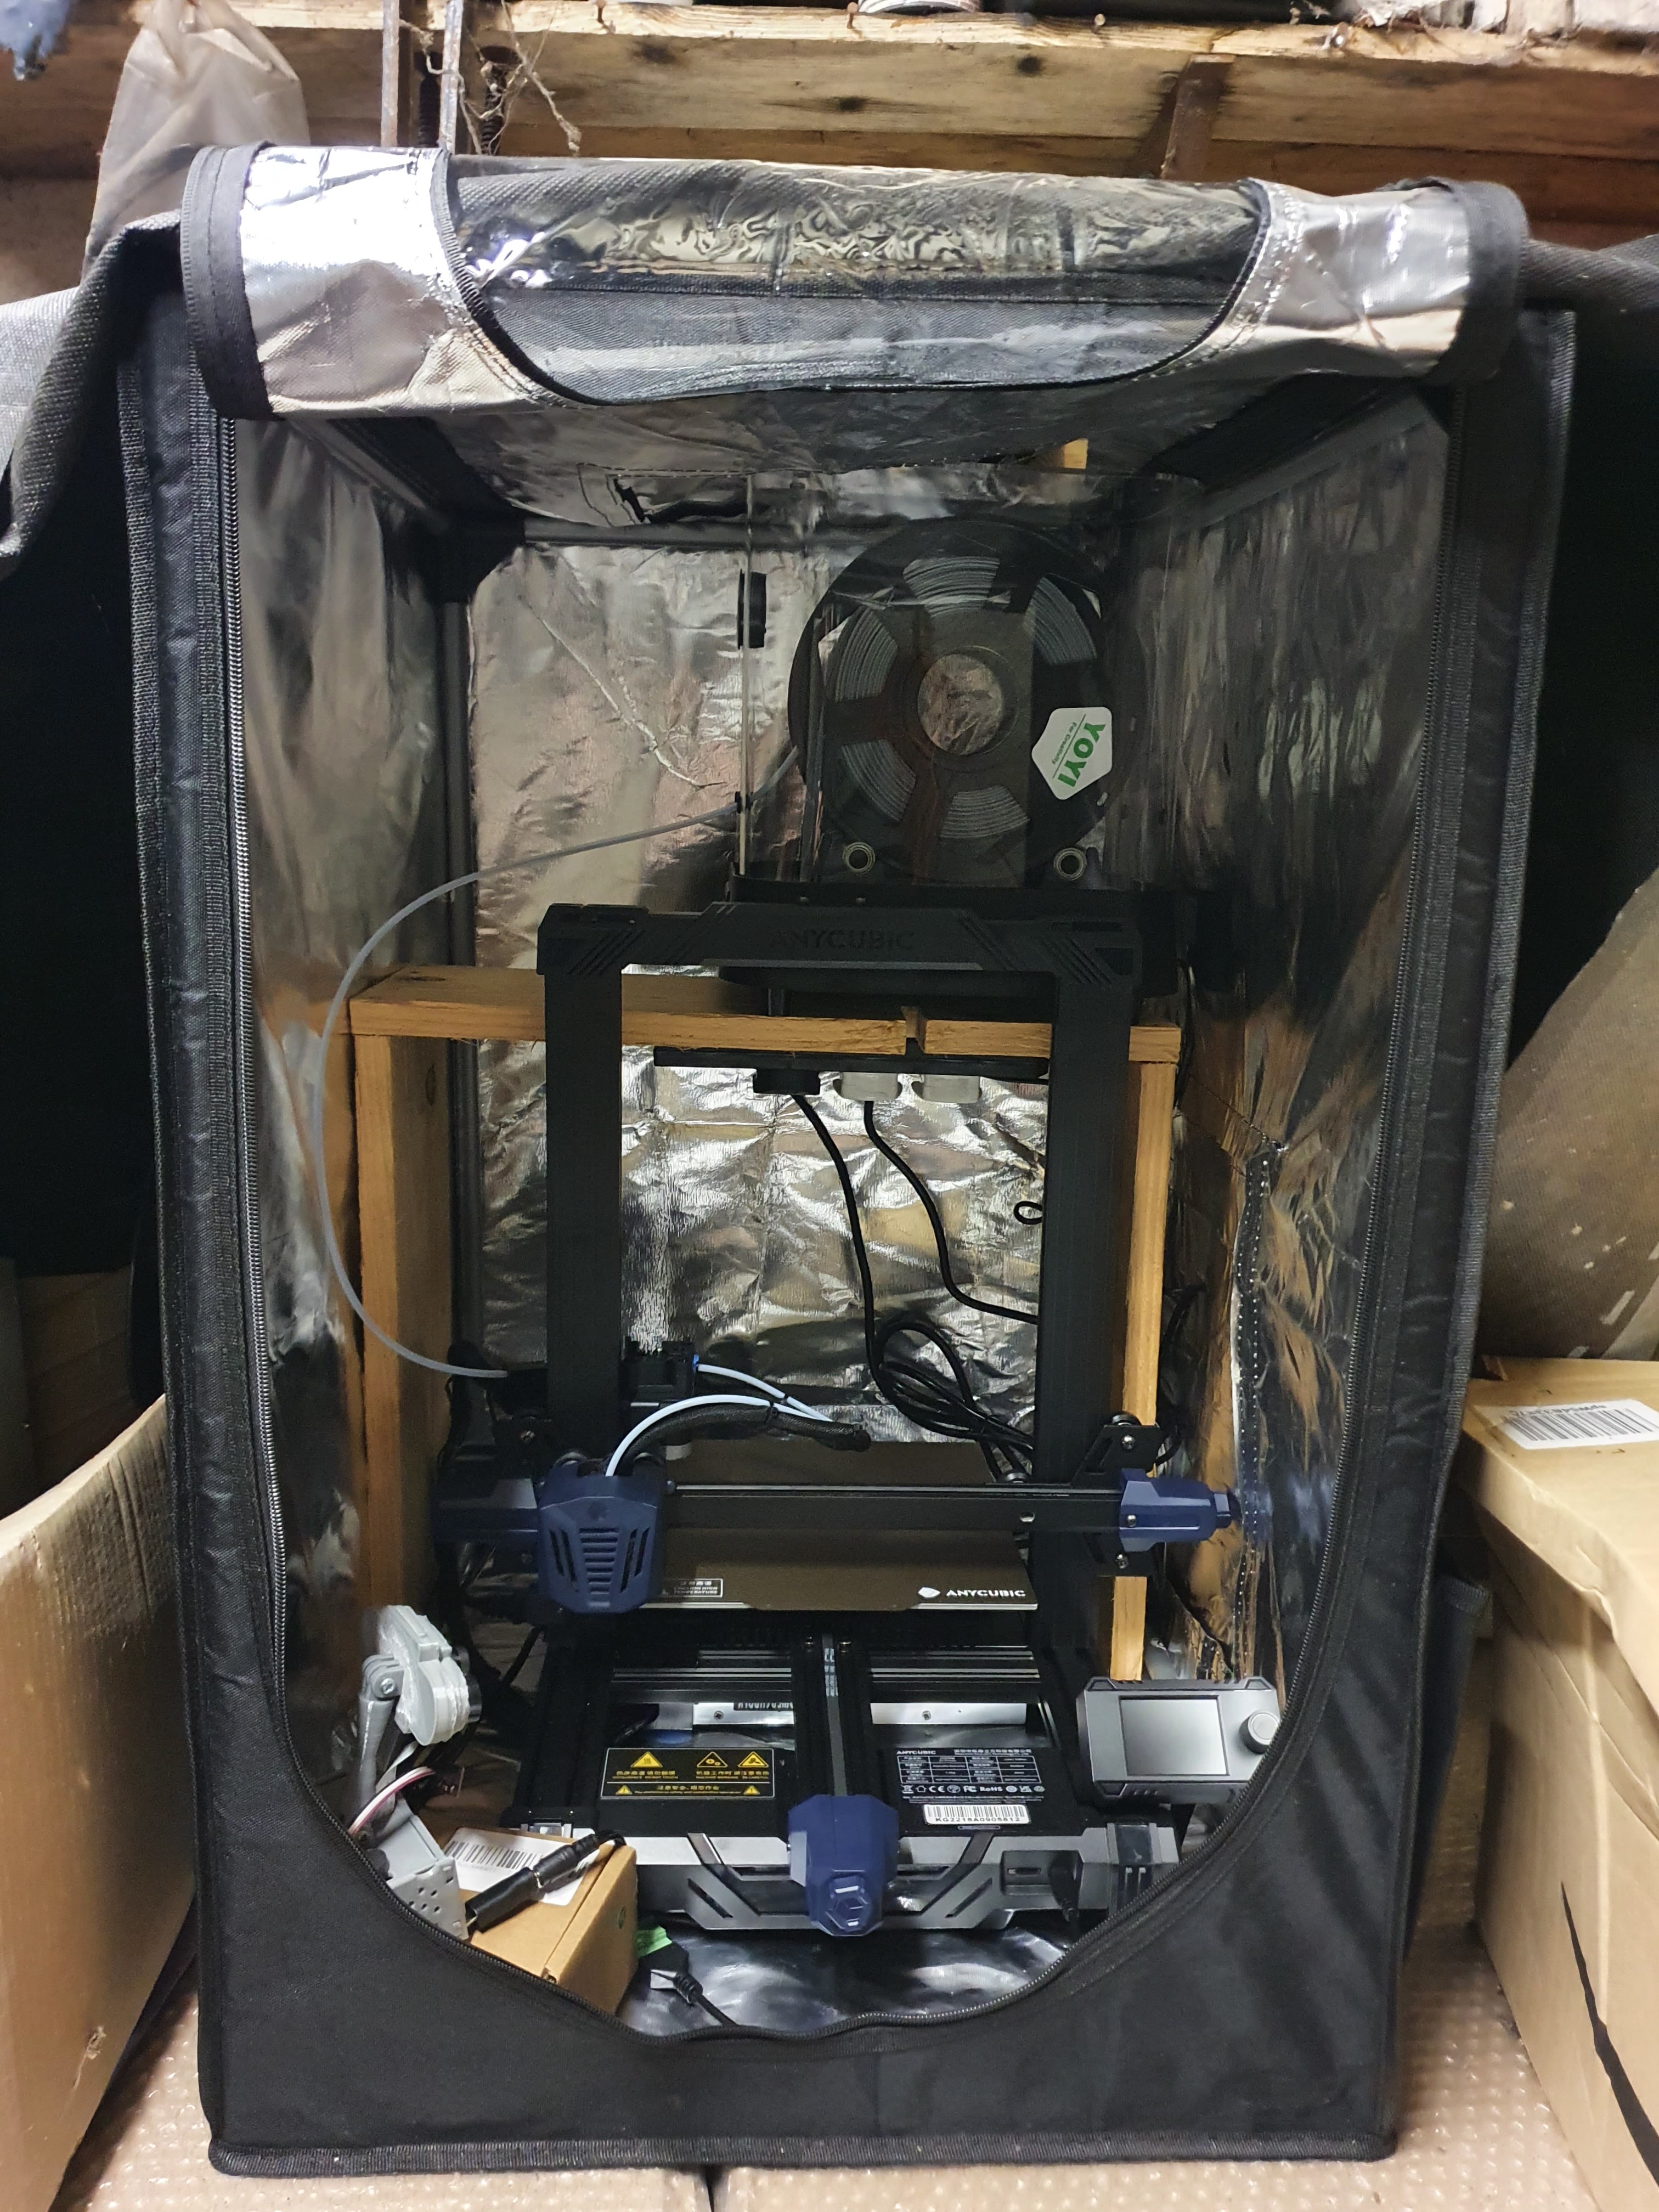
As 3D printers can catch fire and they produce fumes and this one is living in the garage which is full of dirt and insects and cold, I placed the printer inside a fireproof enclosure from the beginning. I had bought an oversized one to fit a filament heater, as southern Ireland is a very damp place and without heating the filament to dry it out first you will not get much printing done successfully. Between the filament heater and the printer, if the lid is closed it gets quite toasty in there, which is a very good thing to avoid curling and bed and layer separation in your prints. Print results, as you have seen, have been very good for such a cheap printer.
For PLA and PETG, by the time upper layers get printed where the enclosure temperature matters for those materials, it will have warmed up. For ABS and ASA you need the enclosure to be fully warmed before printing begins, otherwise your print will not go well. This creates a chicken and egg problem – you can’t start the print without opening the enclosure and letting out the heat. Unless you network it so it can be operated remotely.
The 3D printing hobby community have had for many years a solution to this, it is a dedicated custom edition of Raspbian for Raspberry Pis called Octoprint. You 3D print a case with integrated camera mount using a cheap and nasty IR cut camera, and you need to wire a special USB cable with the 5v line disabled otherwise it won’t be reliable due to bad power supply interactions between the Pi and the printer electronics. You may also notice the BME280 temperature and humidity sensor hanging out the top of the Pi to measure the enclosure’s environment:
2.4 Ghz Wifi reaches into my garage sufficient for the Pi’s embedded antenna just fine, so this works very well. You can remotely watch the camera in pitch dark thanks to the IR lighting, send it stuff to print remotely, and otherwise command and control and monitor all its sensors and progress. I printed its case in PETG, this made snapping it together a bit of a pain, but PETG doesn’t get soft with temperature as easily as PLA so it had to be done. If the enclosure gets up past 40 C, with the camera and Pi adding maybe 15 C to that next to the plastic, PLA I think would sag.
I haven’t tried an ABS print yet using the new setup. I do know what I intend to print, but until the other parts of that arrive from Aliexpress it can wait. In any case, I now can theoretically actually print ABS parts at long last, which was a showstopper for another house related project I’ll describe in a later post if it works out.
House dashboards
As you will remember from past posts which decided this, the house’s automations are based on the Olimex PoE ESP32 board of which I bought fifty. These are great and have proven very reliable, I have one in continuous service as a test and it has been faithfully capturing CO2, temperature, humidity, pressure and air quality every ten minutes and logging them to a network database and showing the numbers on an attached OLED panel. It’s been doing that without break for two years, and has been utterly trouble free. Well, the OLED panel is losing brightness, so I won’t be using more of those in the future, but the board and sensors have been working very well.
As much as the ESP32 is great, it has limited capabilities to drive a display, especially my older ‘WROOM’ edition which unlike the ‘WROVER’ edition it lacks external PSRAM. Due to its slow onboard RAM and that its fastest interface its SPI bus can’t be driven much past 50 Mhz, any attached display maxes out at around 320 x 240. That’s fine for small local displays, but not useful for dashboards you’d want to notice from afar if something is going wrong e.g. thermal store is low on hot water.
I happened to come across on HackerNews that you can now get six colour e-paper for a reasonable price. These displays have the big advantage of costing zero power if they are not being changed, and I was curious to see if they might be suitable for my dashboards as the black and white ones traditionally available didn’t have any way to signal ‘attention’ via colour. I thus bought from Waveshare a 7.3 inch six colour e-paper display for €86 inc VAT, which was as much as I was willing to punt on a test. They have much bigger displays, but those cost a lot more.
While I was on the Waveshare website I noticed that (a) they would sell me multiple Raspberry Pi Zero 2’s in a single order, as many as I would like and (b) they had a reasonably priced PoE hat and case for the Zero. So I ordered four of those, taking advantage of the volume discount and once assembled they look like this:
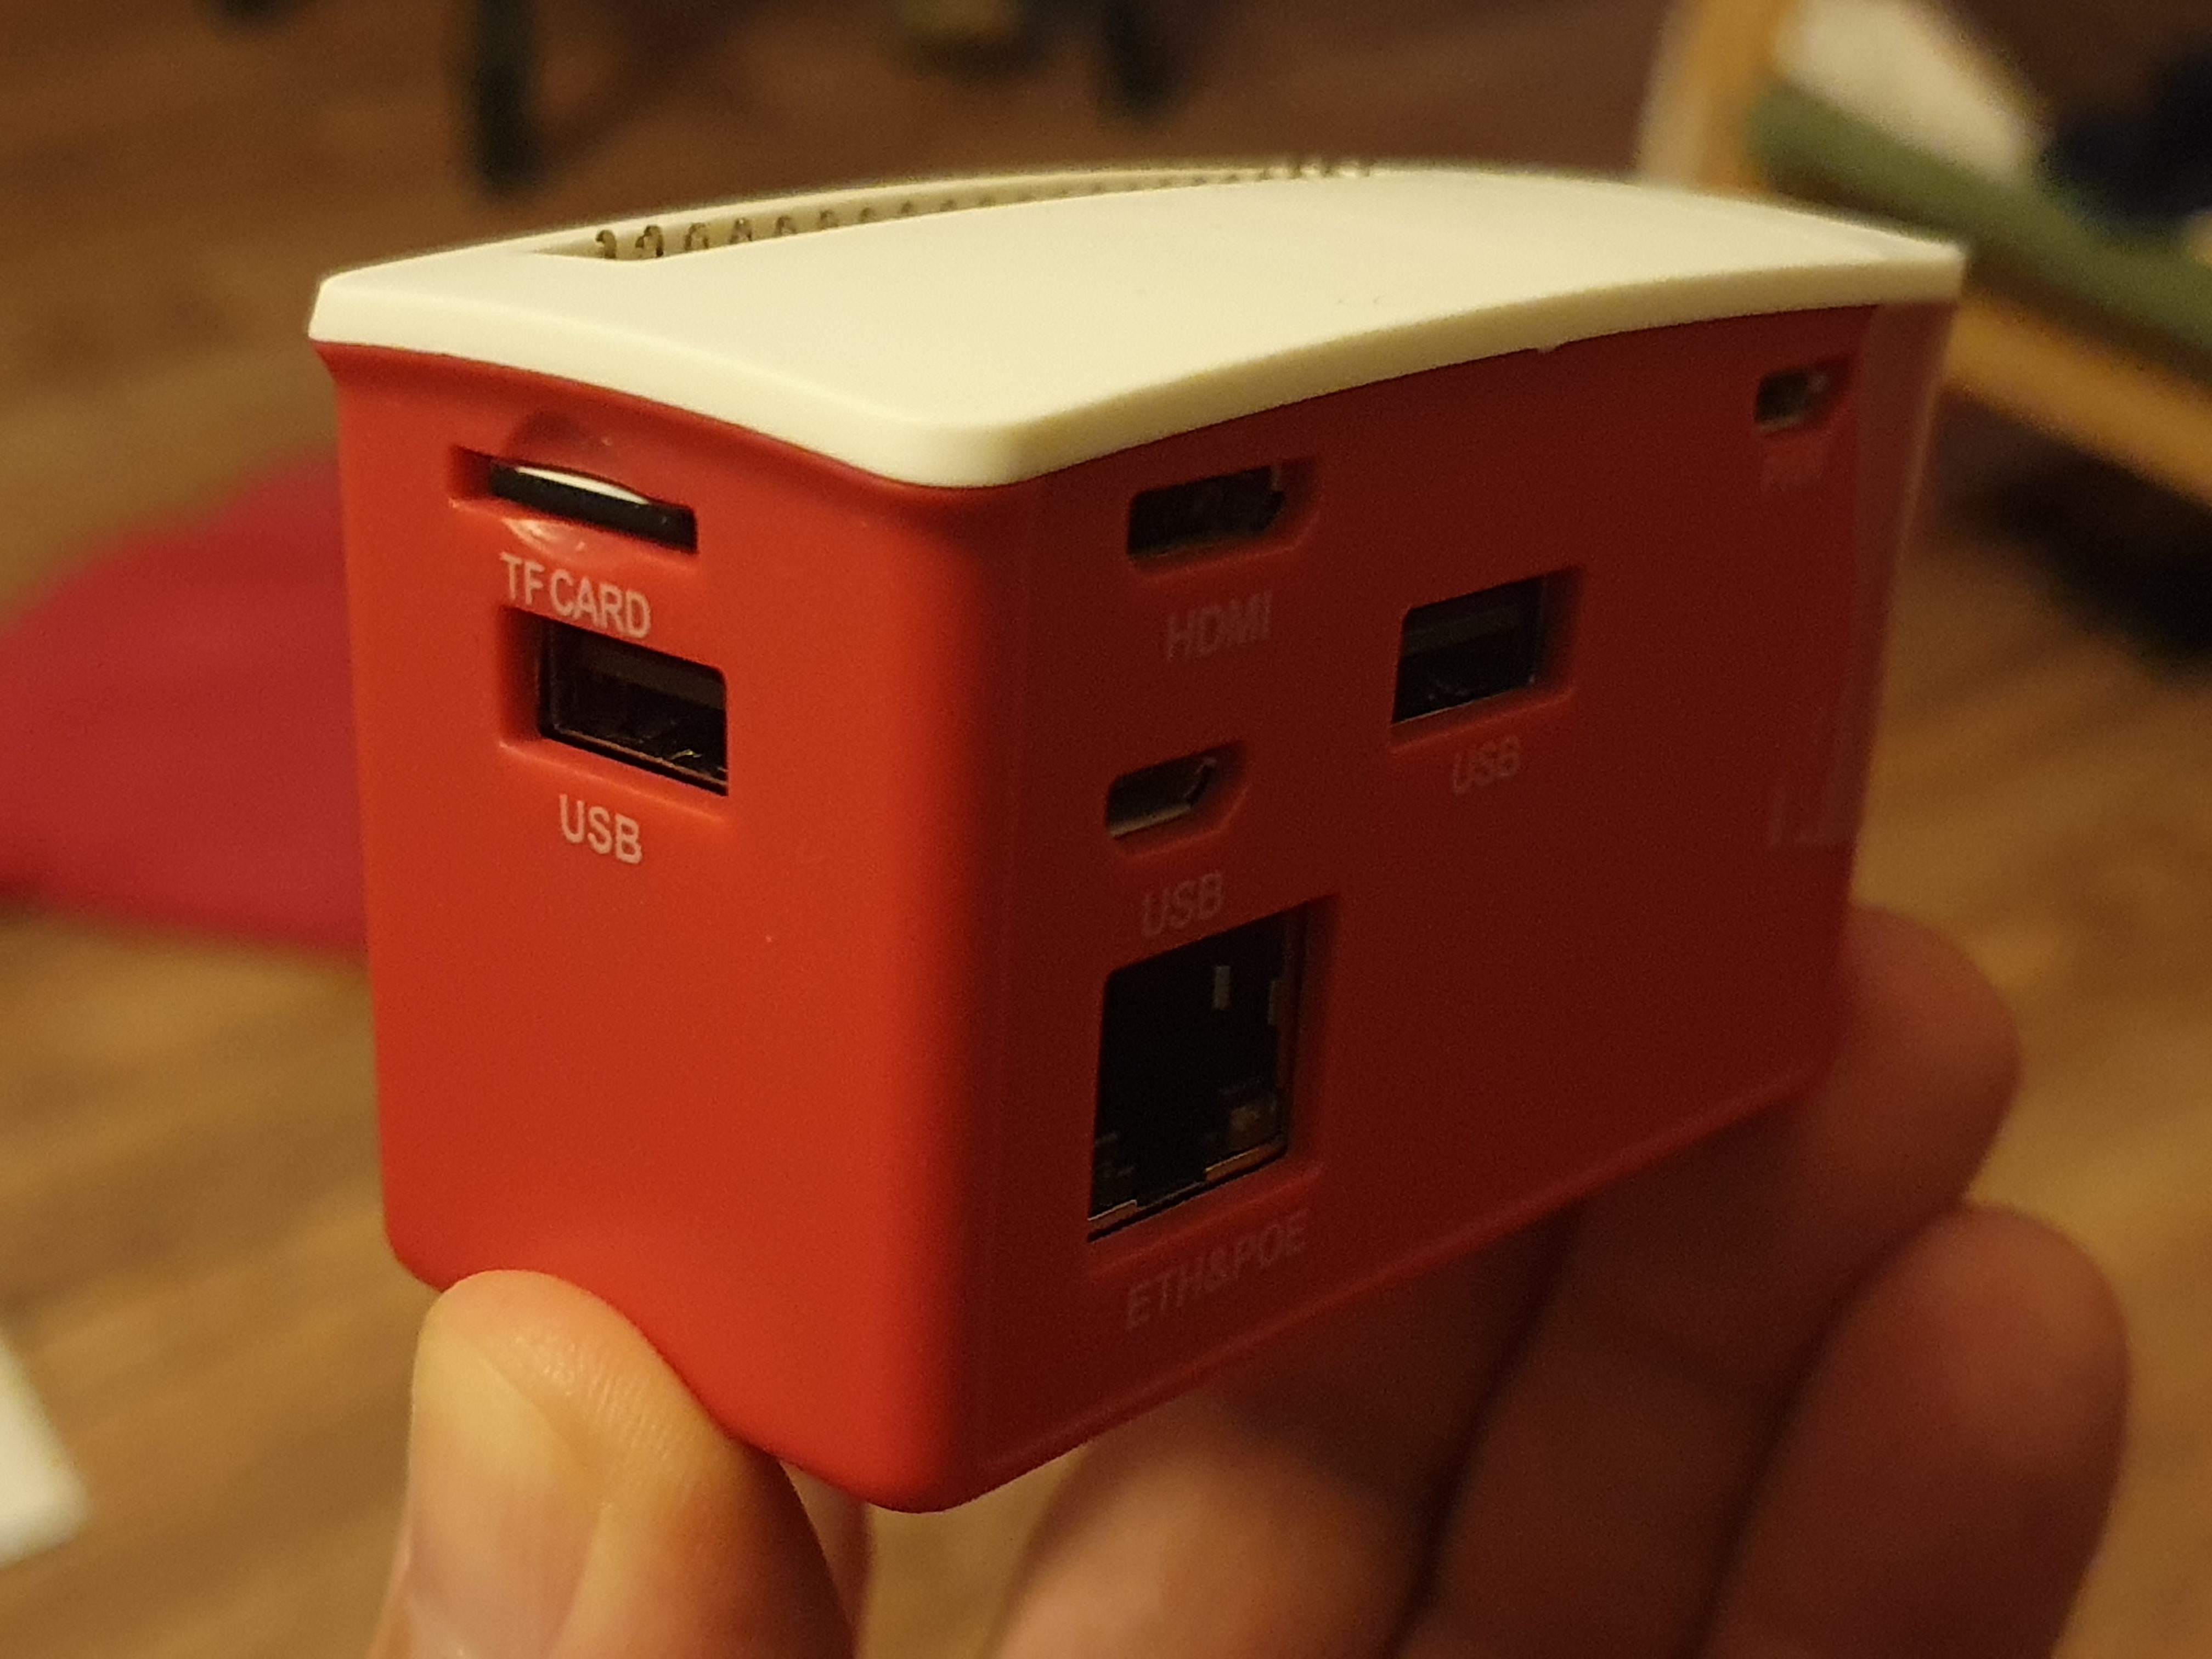
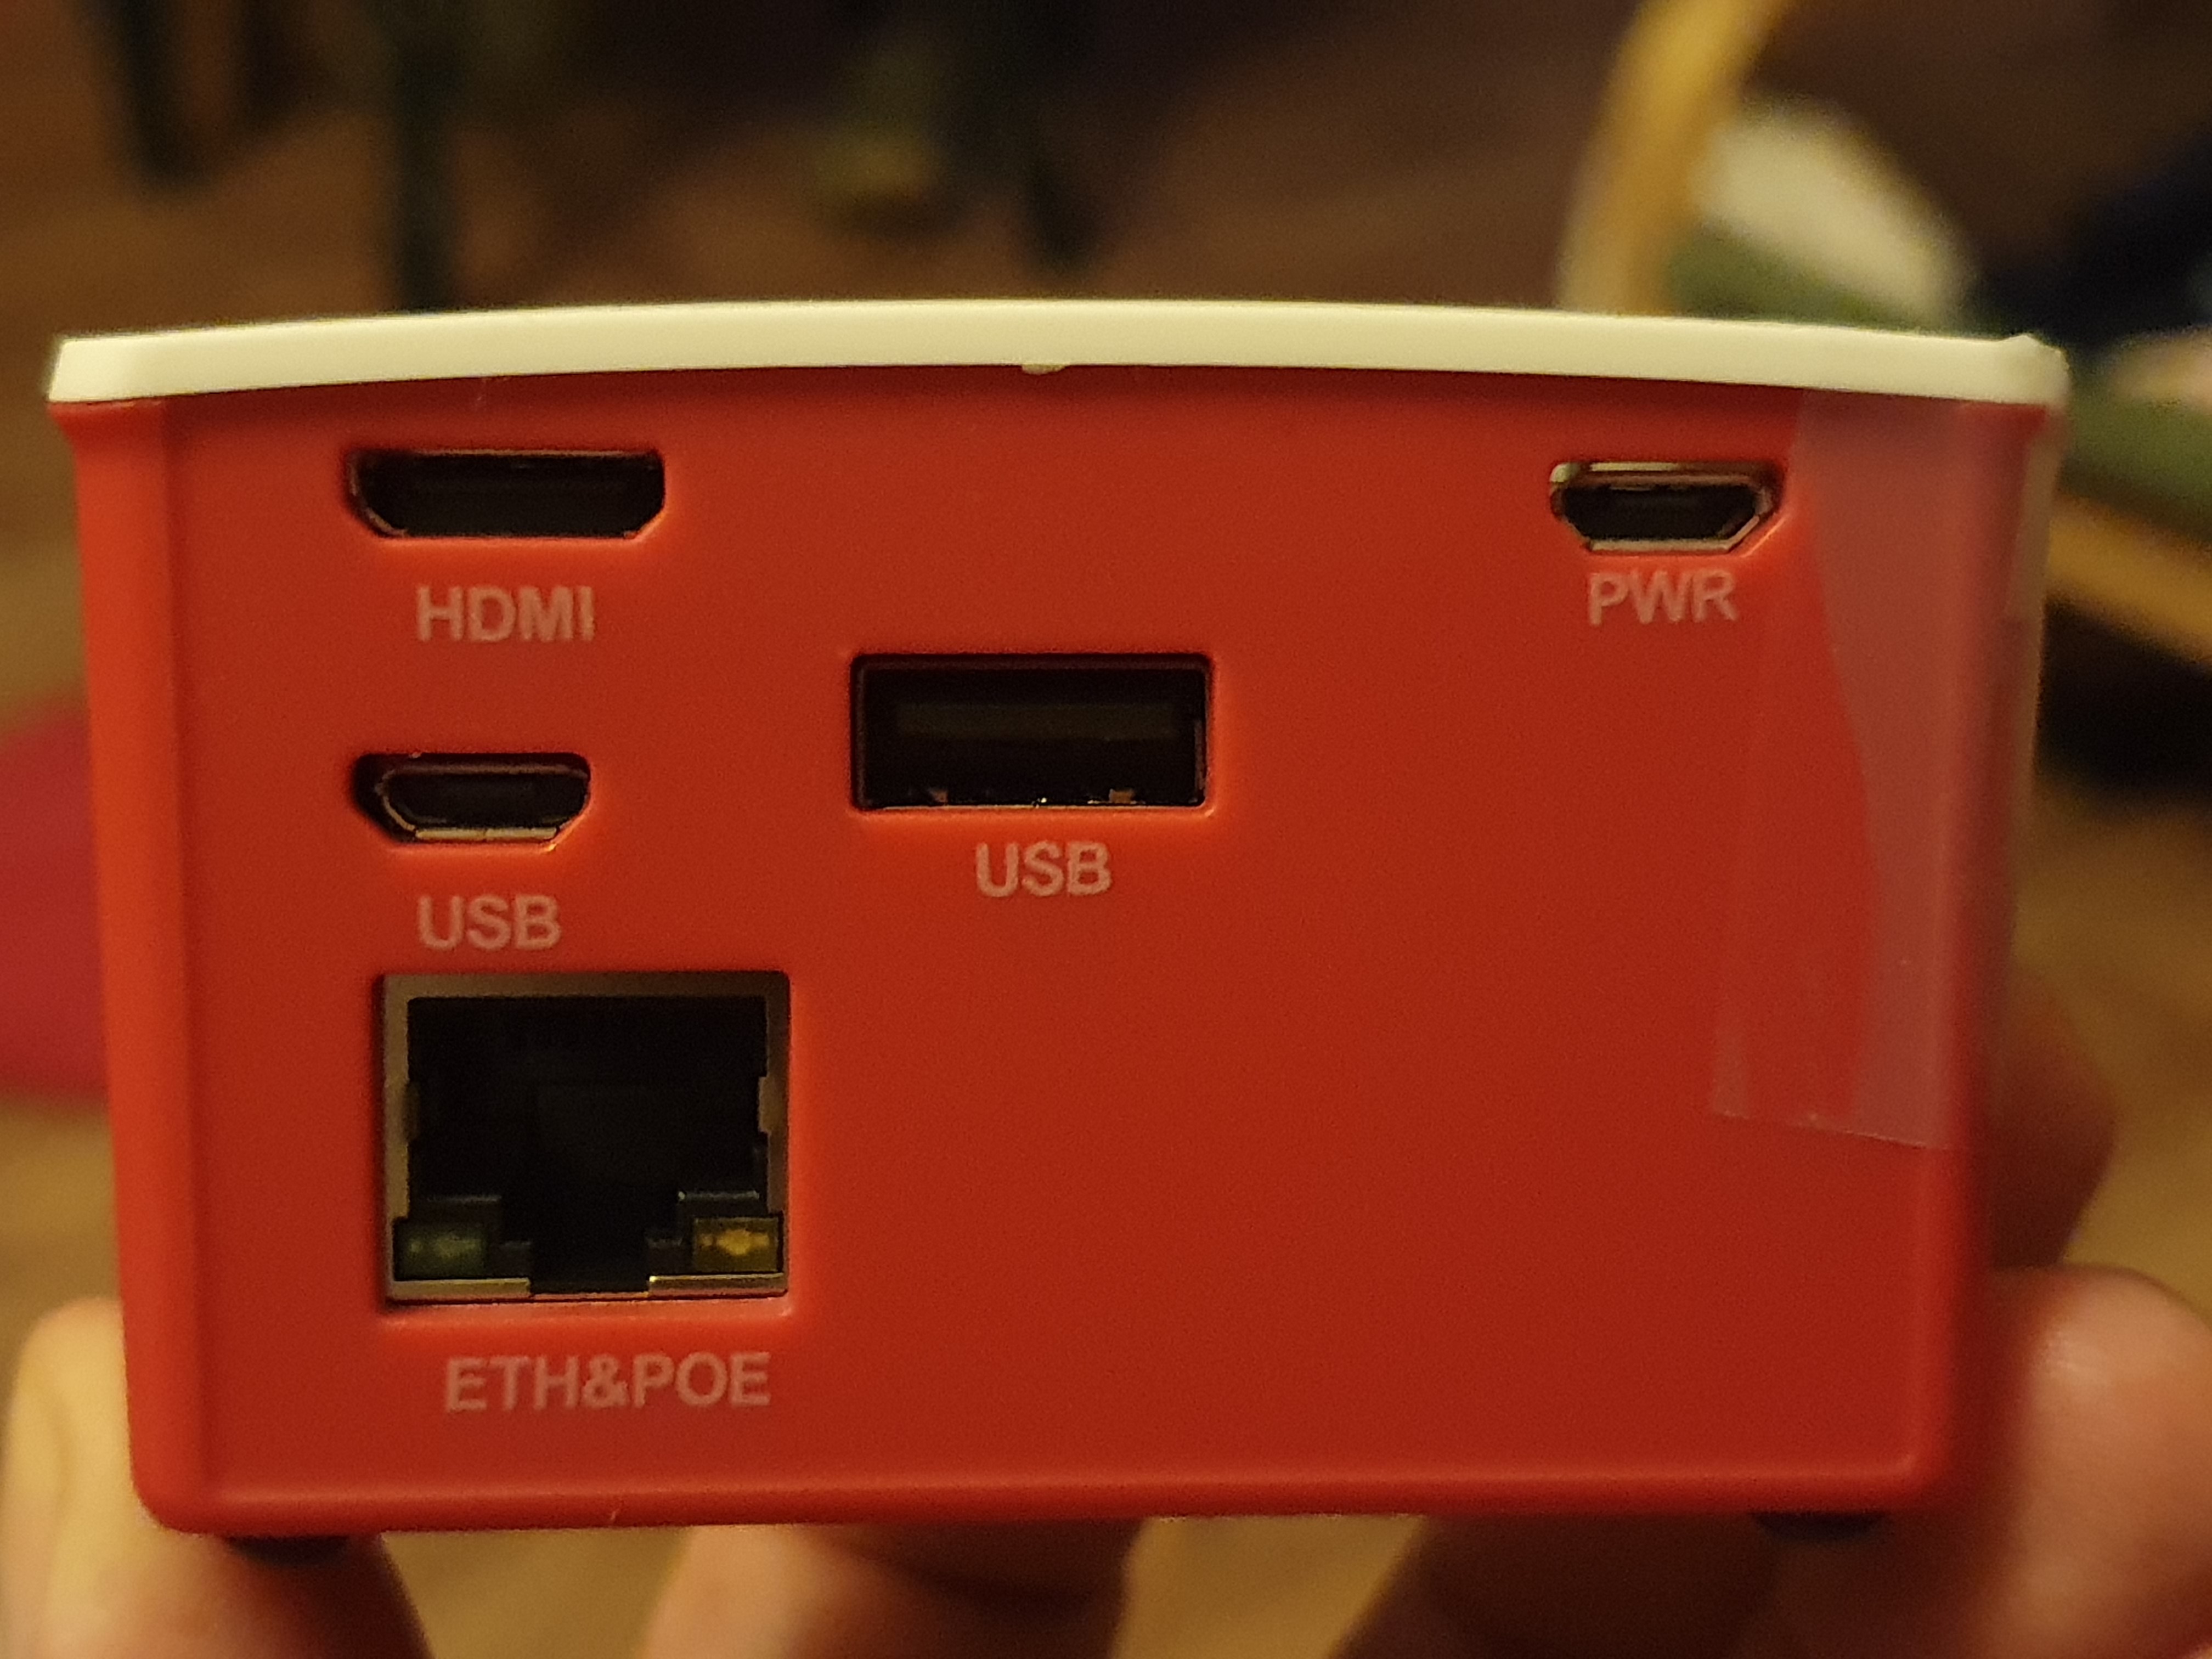
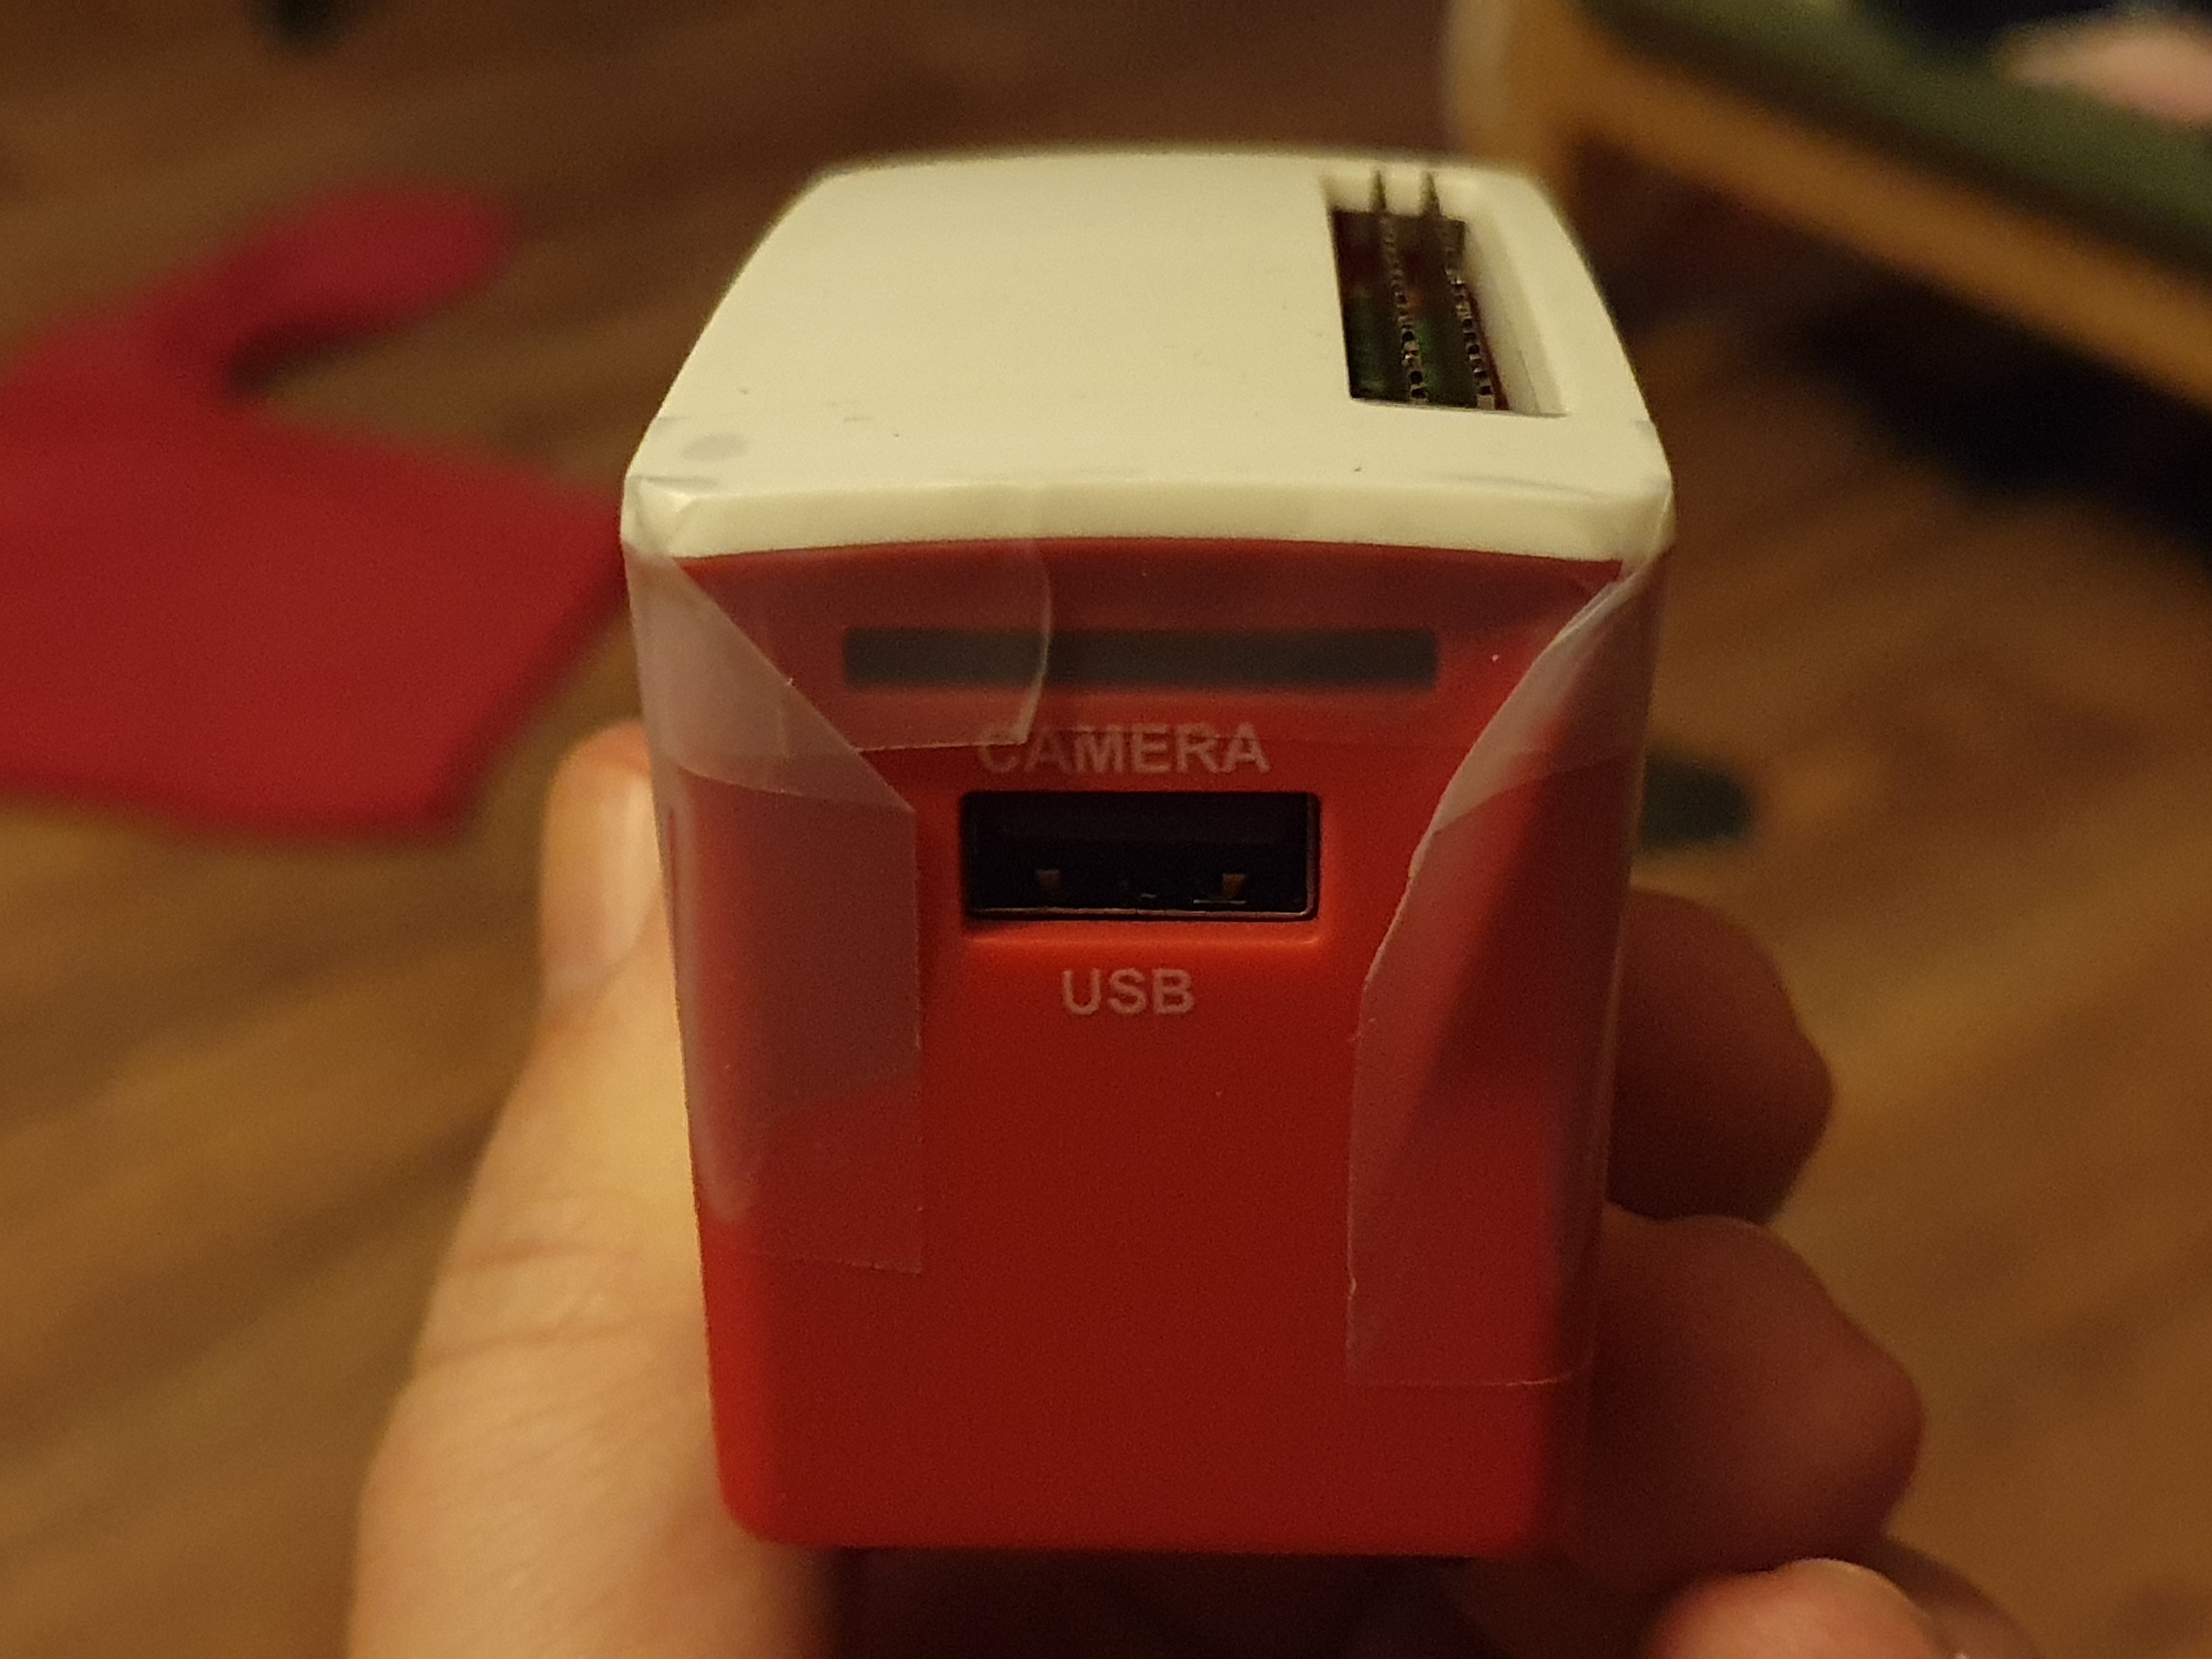
The sellotape is to keep the lid on, as it isn’t tightly fitting. But yeah, all the ports of the Pi Zero 2 exposed, with four additional USB ports, and a 100 Mbit PoE ethernet, with case for €57.50 inc VAT each. This isn’t exactly cheap, about double my cost estimates from three years ago for a Pi based PoE powered solution. However (i) this is a Pi Zero 2 not a Pi Zero (ii) Pis don’t cost €5 anymore from anywhere, these were in fact €26 inc VAT each (iii) the PoE circuitry here is ‘proper’ and not cheap and based on an inefficient linear converter like the Olimex boards (iv) there has been a good +25% price inflation in general terms since that post three years ago. This explains the doubling of cost, as much as none of us will like it.
They definitely have a switching power converter in their PoE circuits:
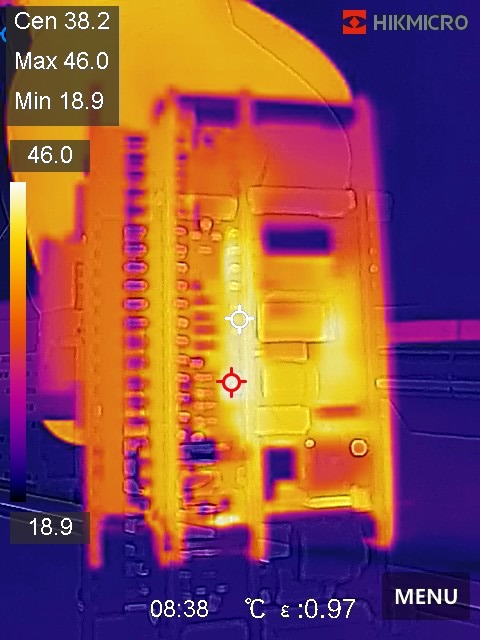
46 C is as hot as I could make the overall assembly – the Pi Zero 2 going full belt draws maybe 3.3 watts according to https://www.cnx-software.com/2021/12/09/raspberry-pi-zero-2-w-power-consumption/. I probably didn’t have it drawing that much from the SoC, but I did add a bit of load on USB. Waveshare claim their PoE circuit can sustain 12.5 watts which is the bottom grade of PoE, and I didn’t test more than maybe 5 watts. But I would be surprised if the temperature got much past 65 C even at full load. Unlike the Olimex board’s cheap linear converter, this one appears to be switched, with three hefty large capacitors to smooth out the buck converter. I guess you get what you pay for in this stuff, though not always as my review of PoE ESP32 boards a few years ago showed – boards costing more than this still had crap PoE circuits, so it’s nice to see Waveshare didn’t skimp here.
As much as this is qualitatively better it is obviously still four times more than the €15 inc VAT per PoE ESP32 board (and I exclude the sdcard, which takes it up to just over €60 inc VAT per Pi), however I don’t expect to need many of these in the house, in fact I think three is likely plenty with the fourth as the spare. And unlike the ESP32s, these can drive big displays, up to 1440p over HDMI albeit at a reduced refresh rate. You do need to keep resolutions below 2048 if you want hardware graphics acceleration to work however.
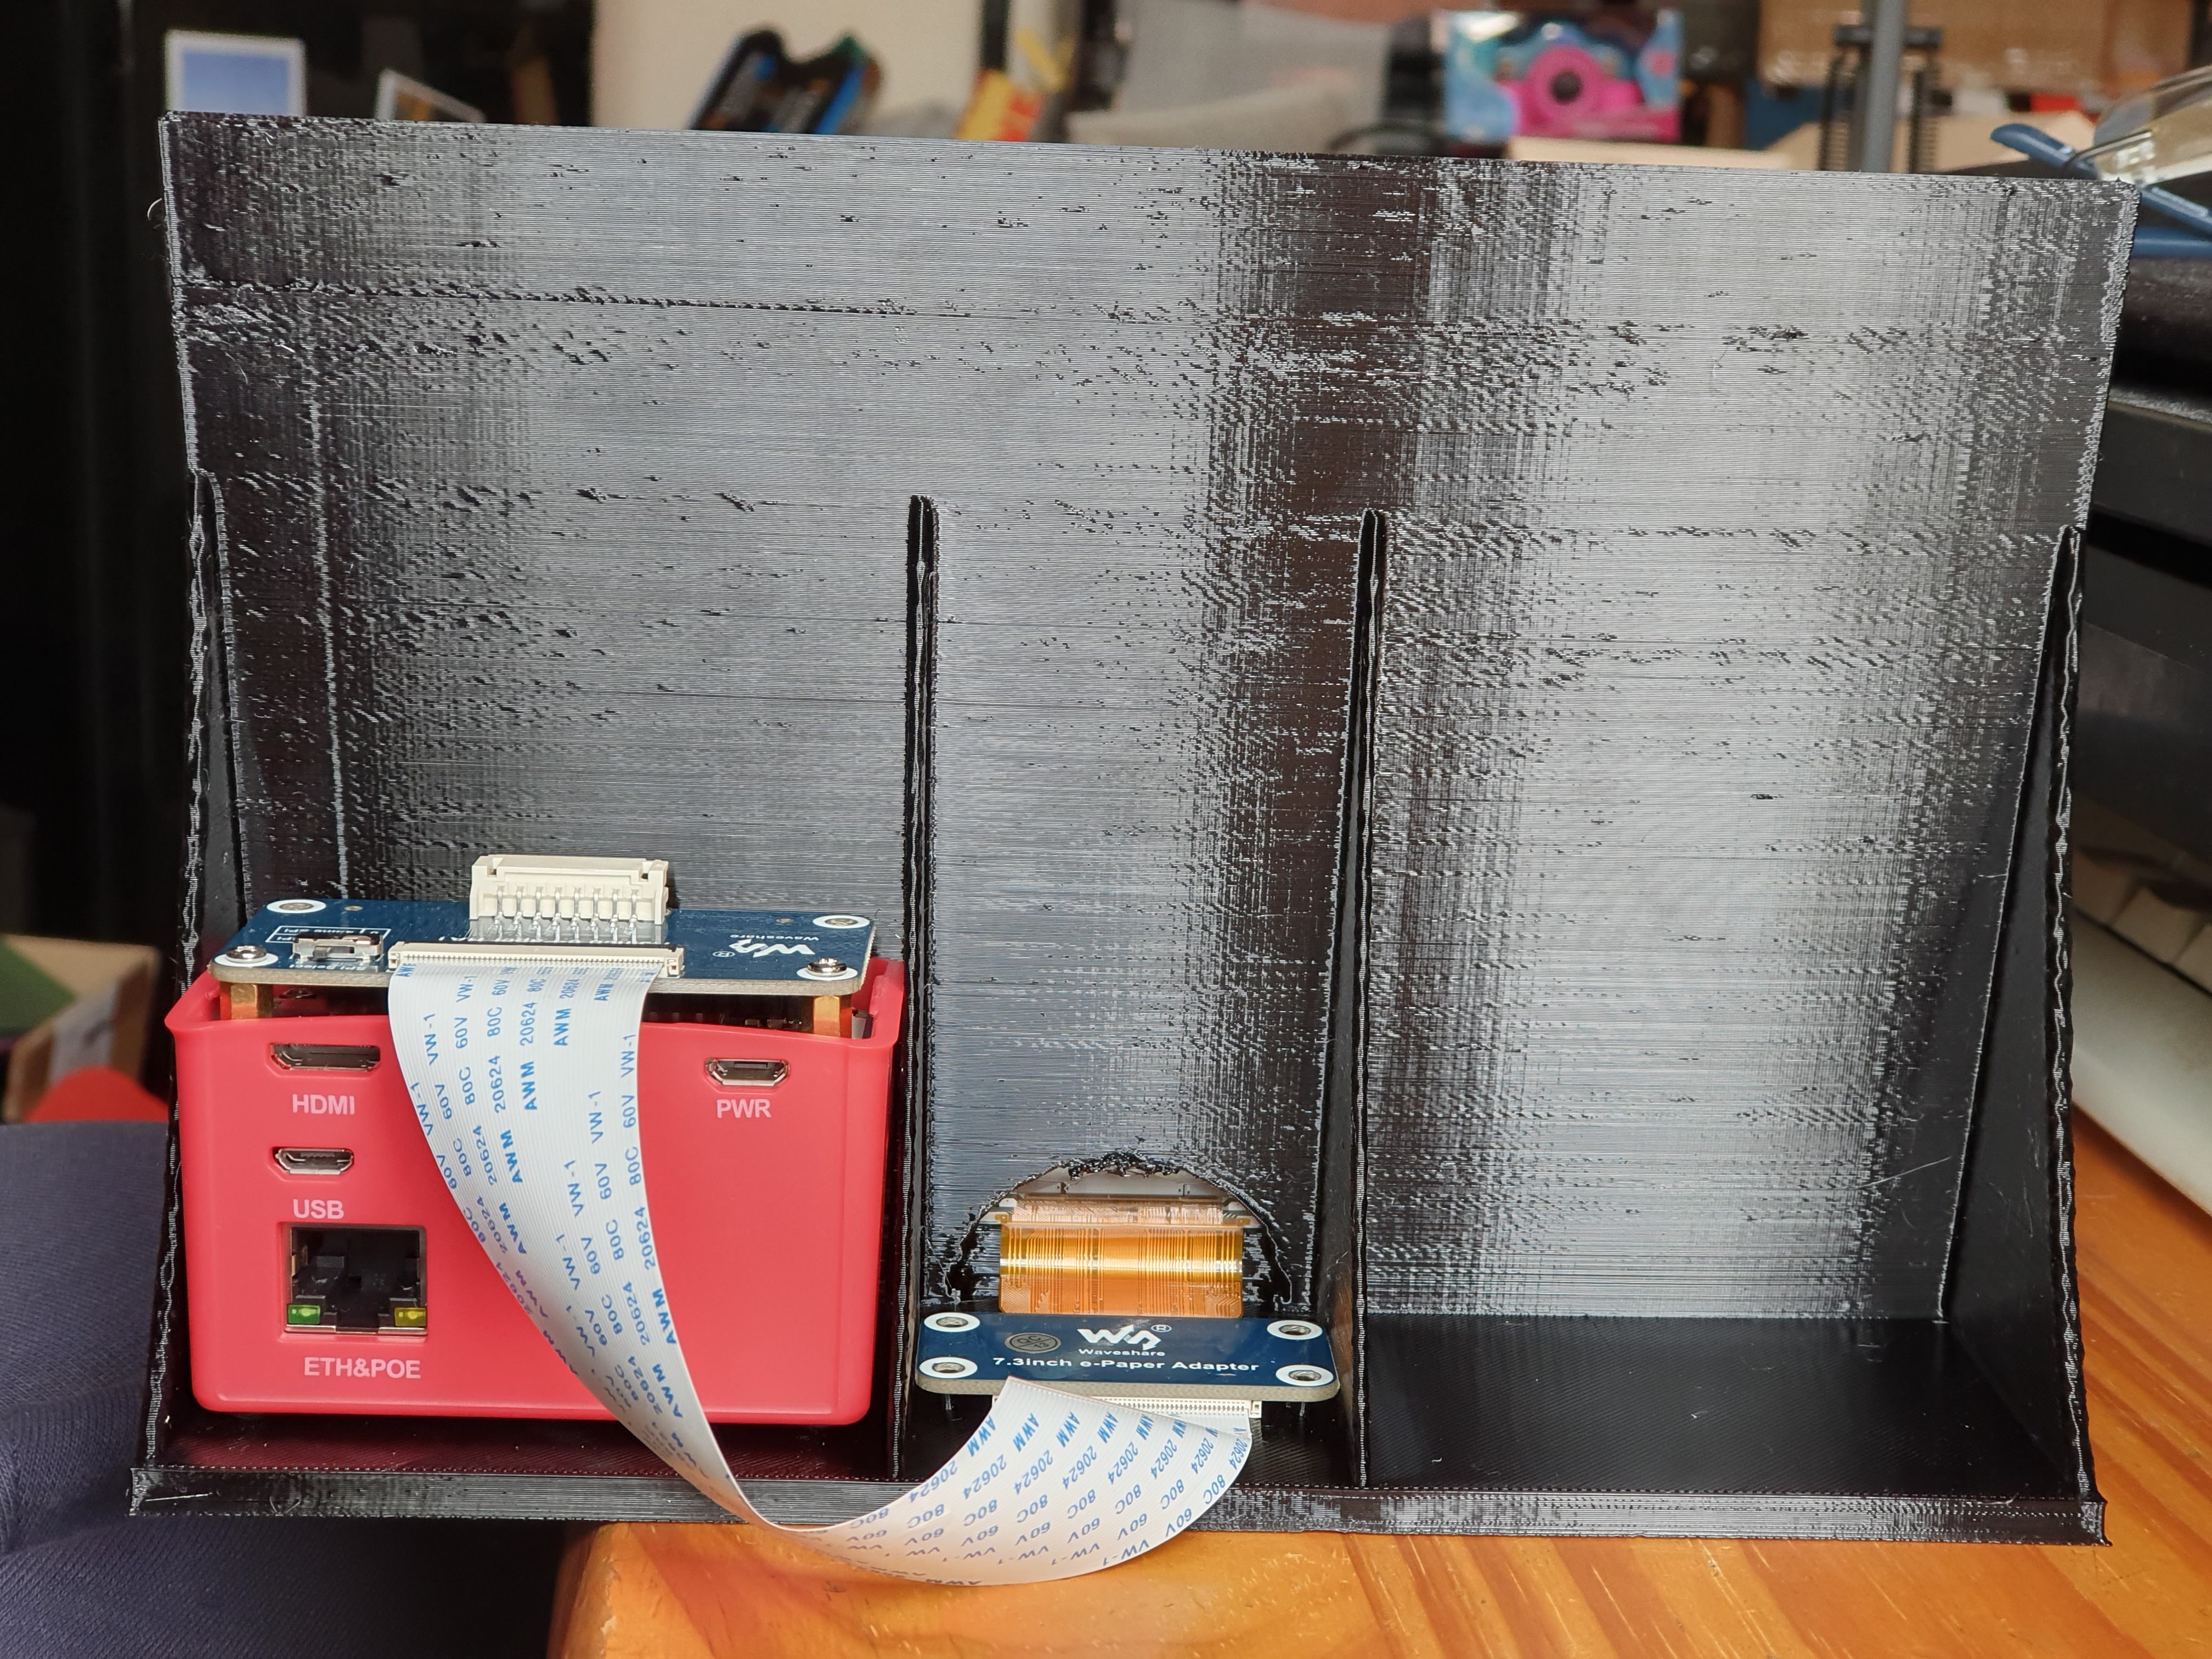
Waveshare supply a convenient HAT for the PI to drive their e-paper displays. The displays themselves are very delicate, in fact I managed to fatally crack my one trying to get it into the predecessor of this frame which is my first ever 100% designed by me 3D printed item:
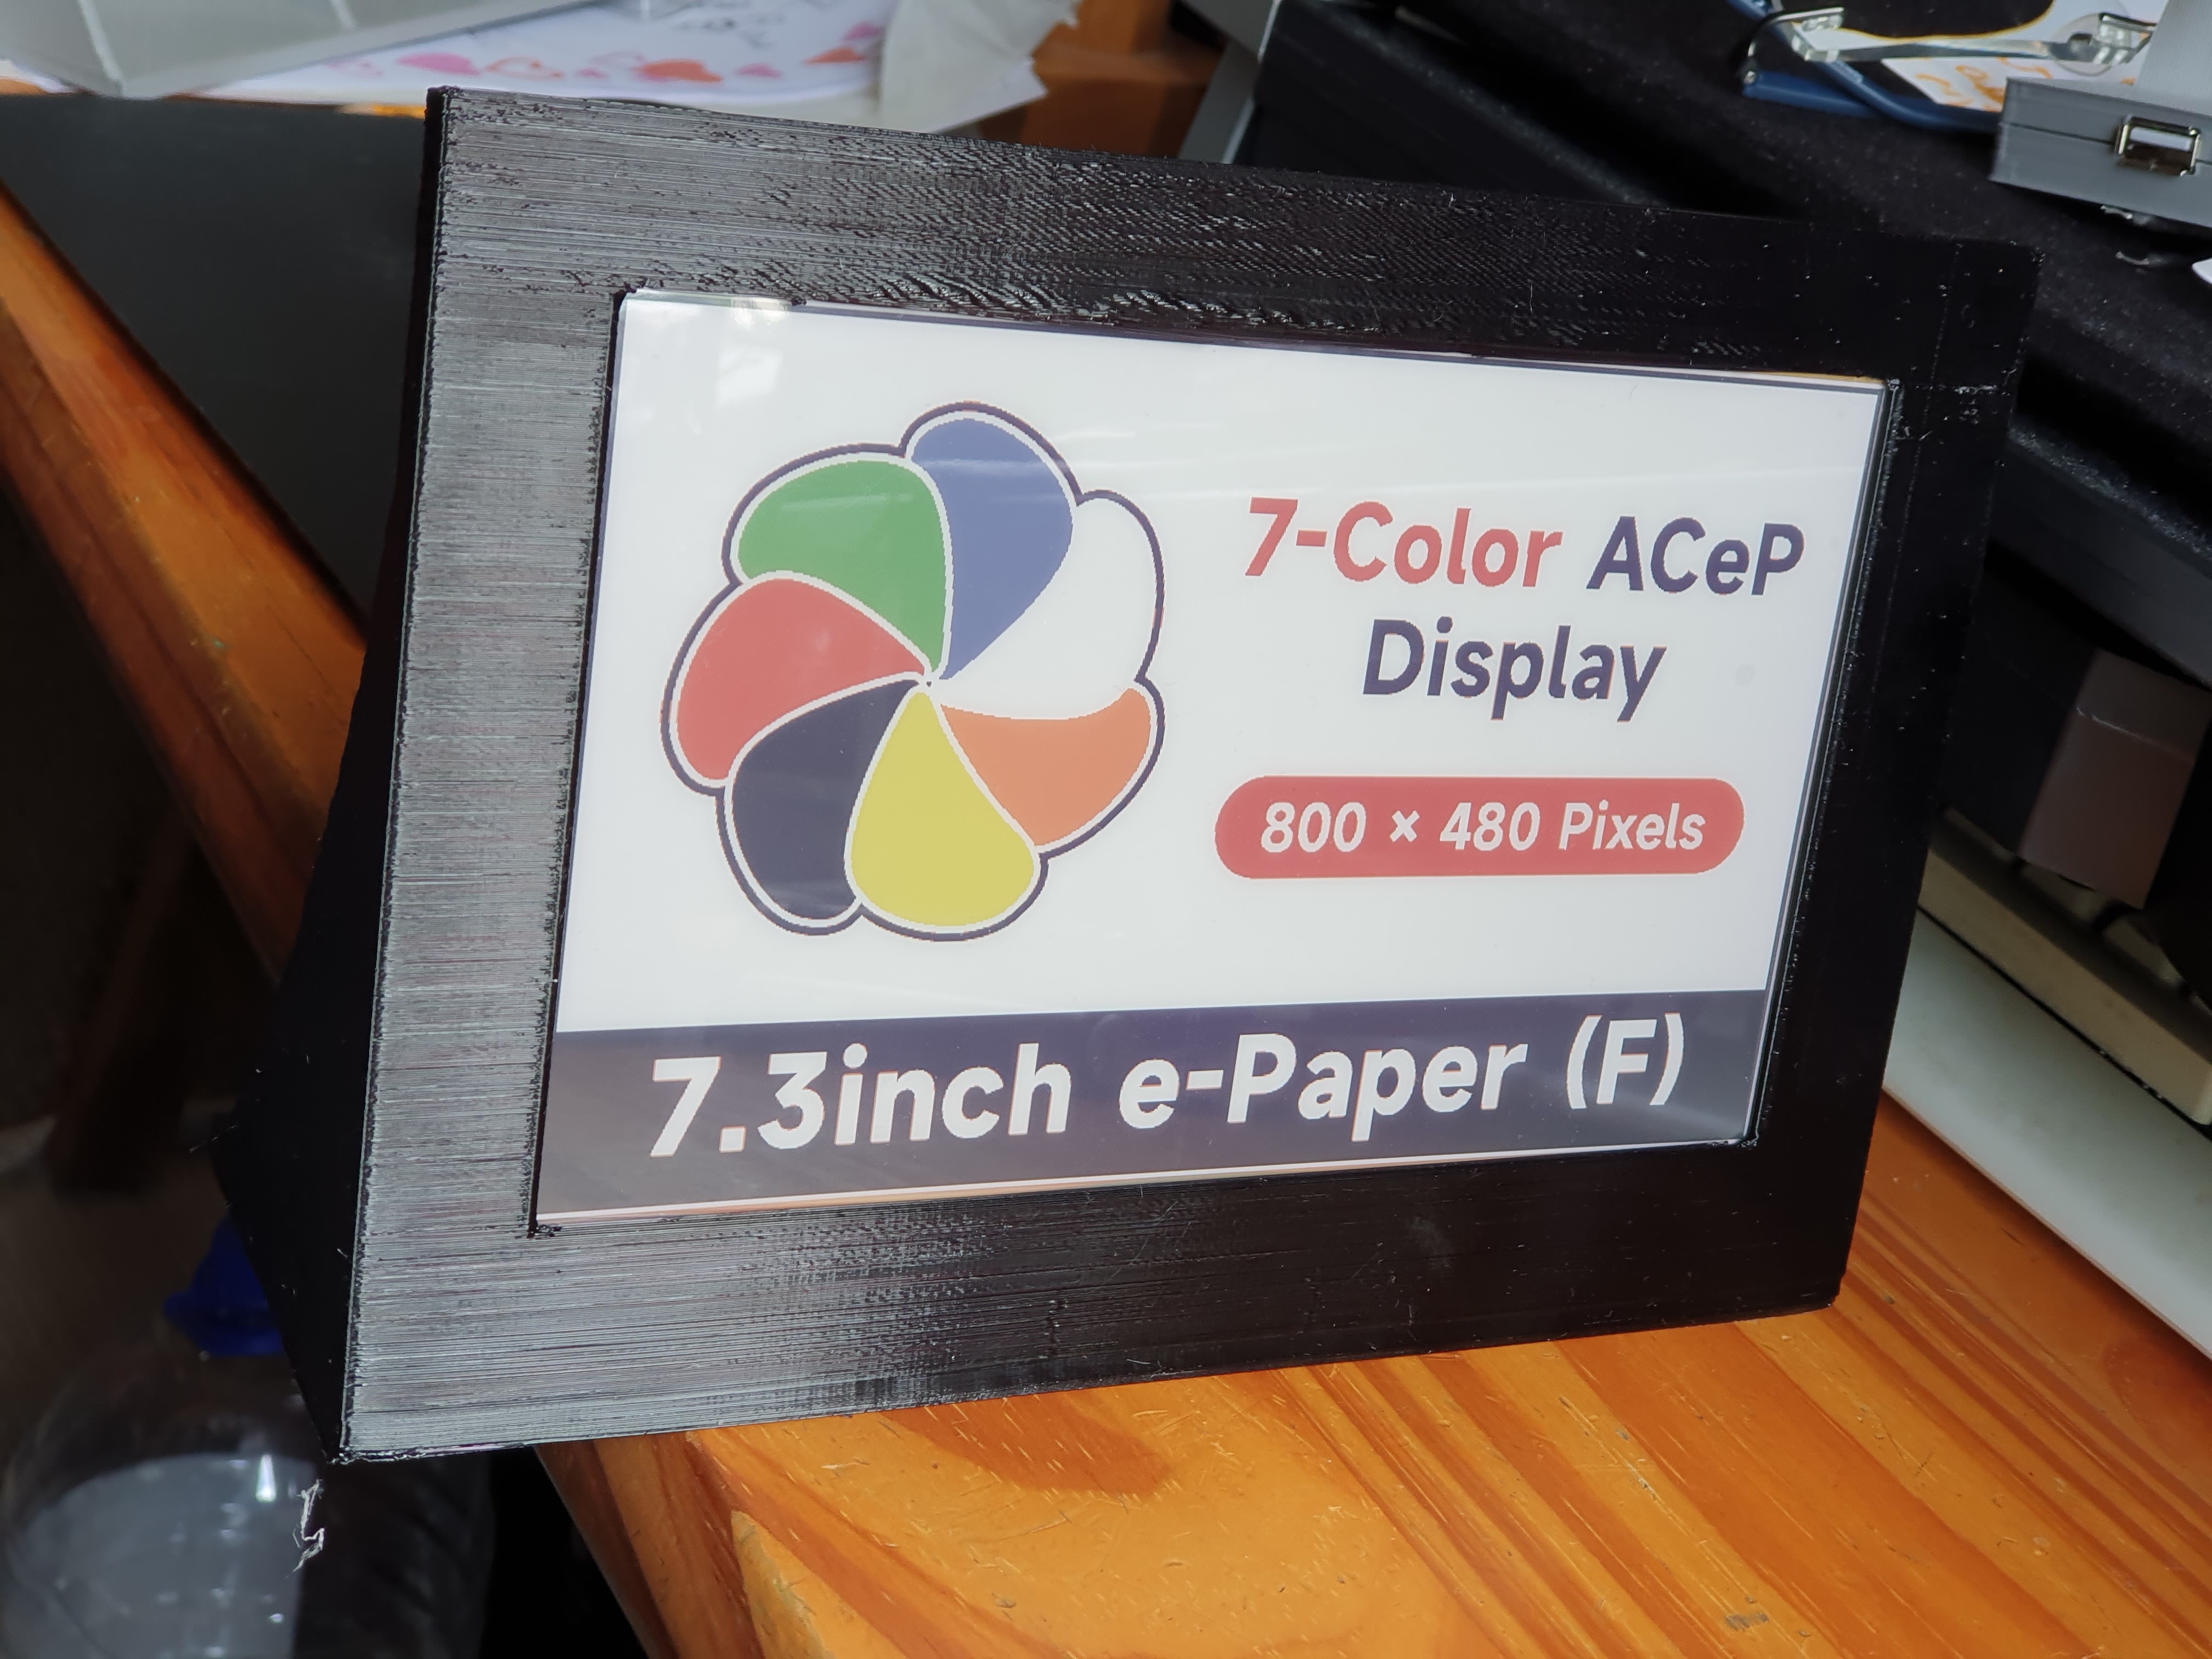
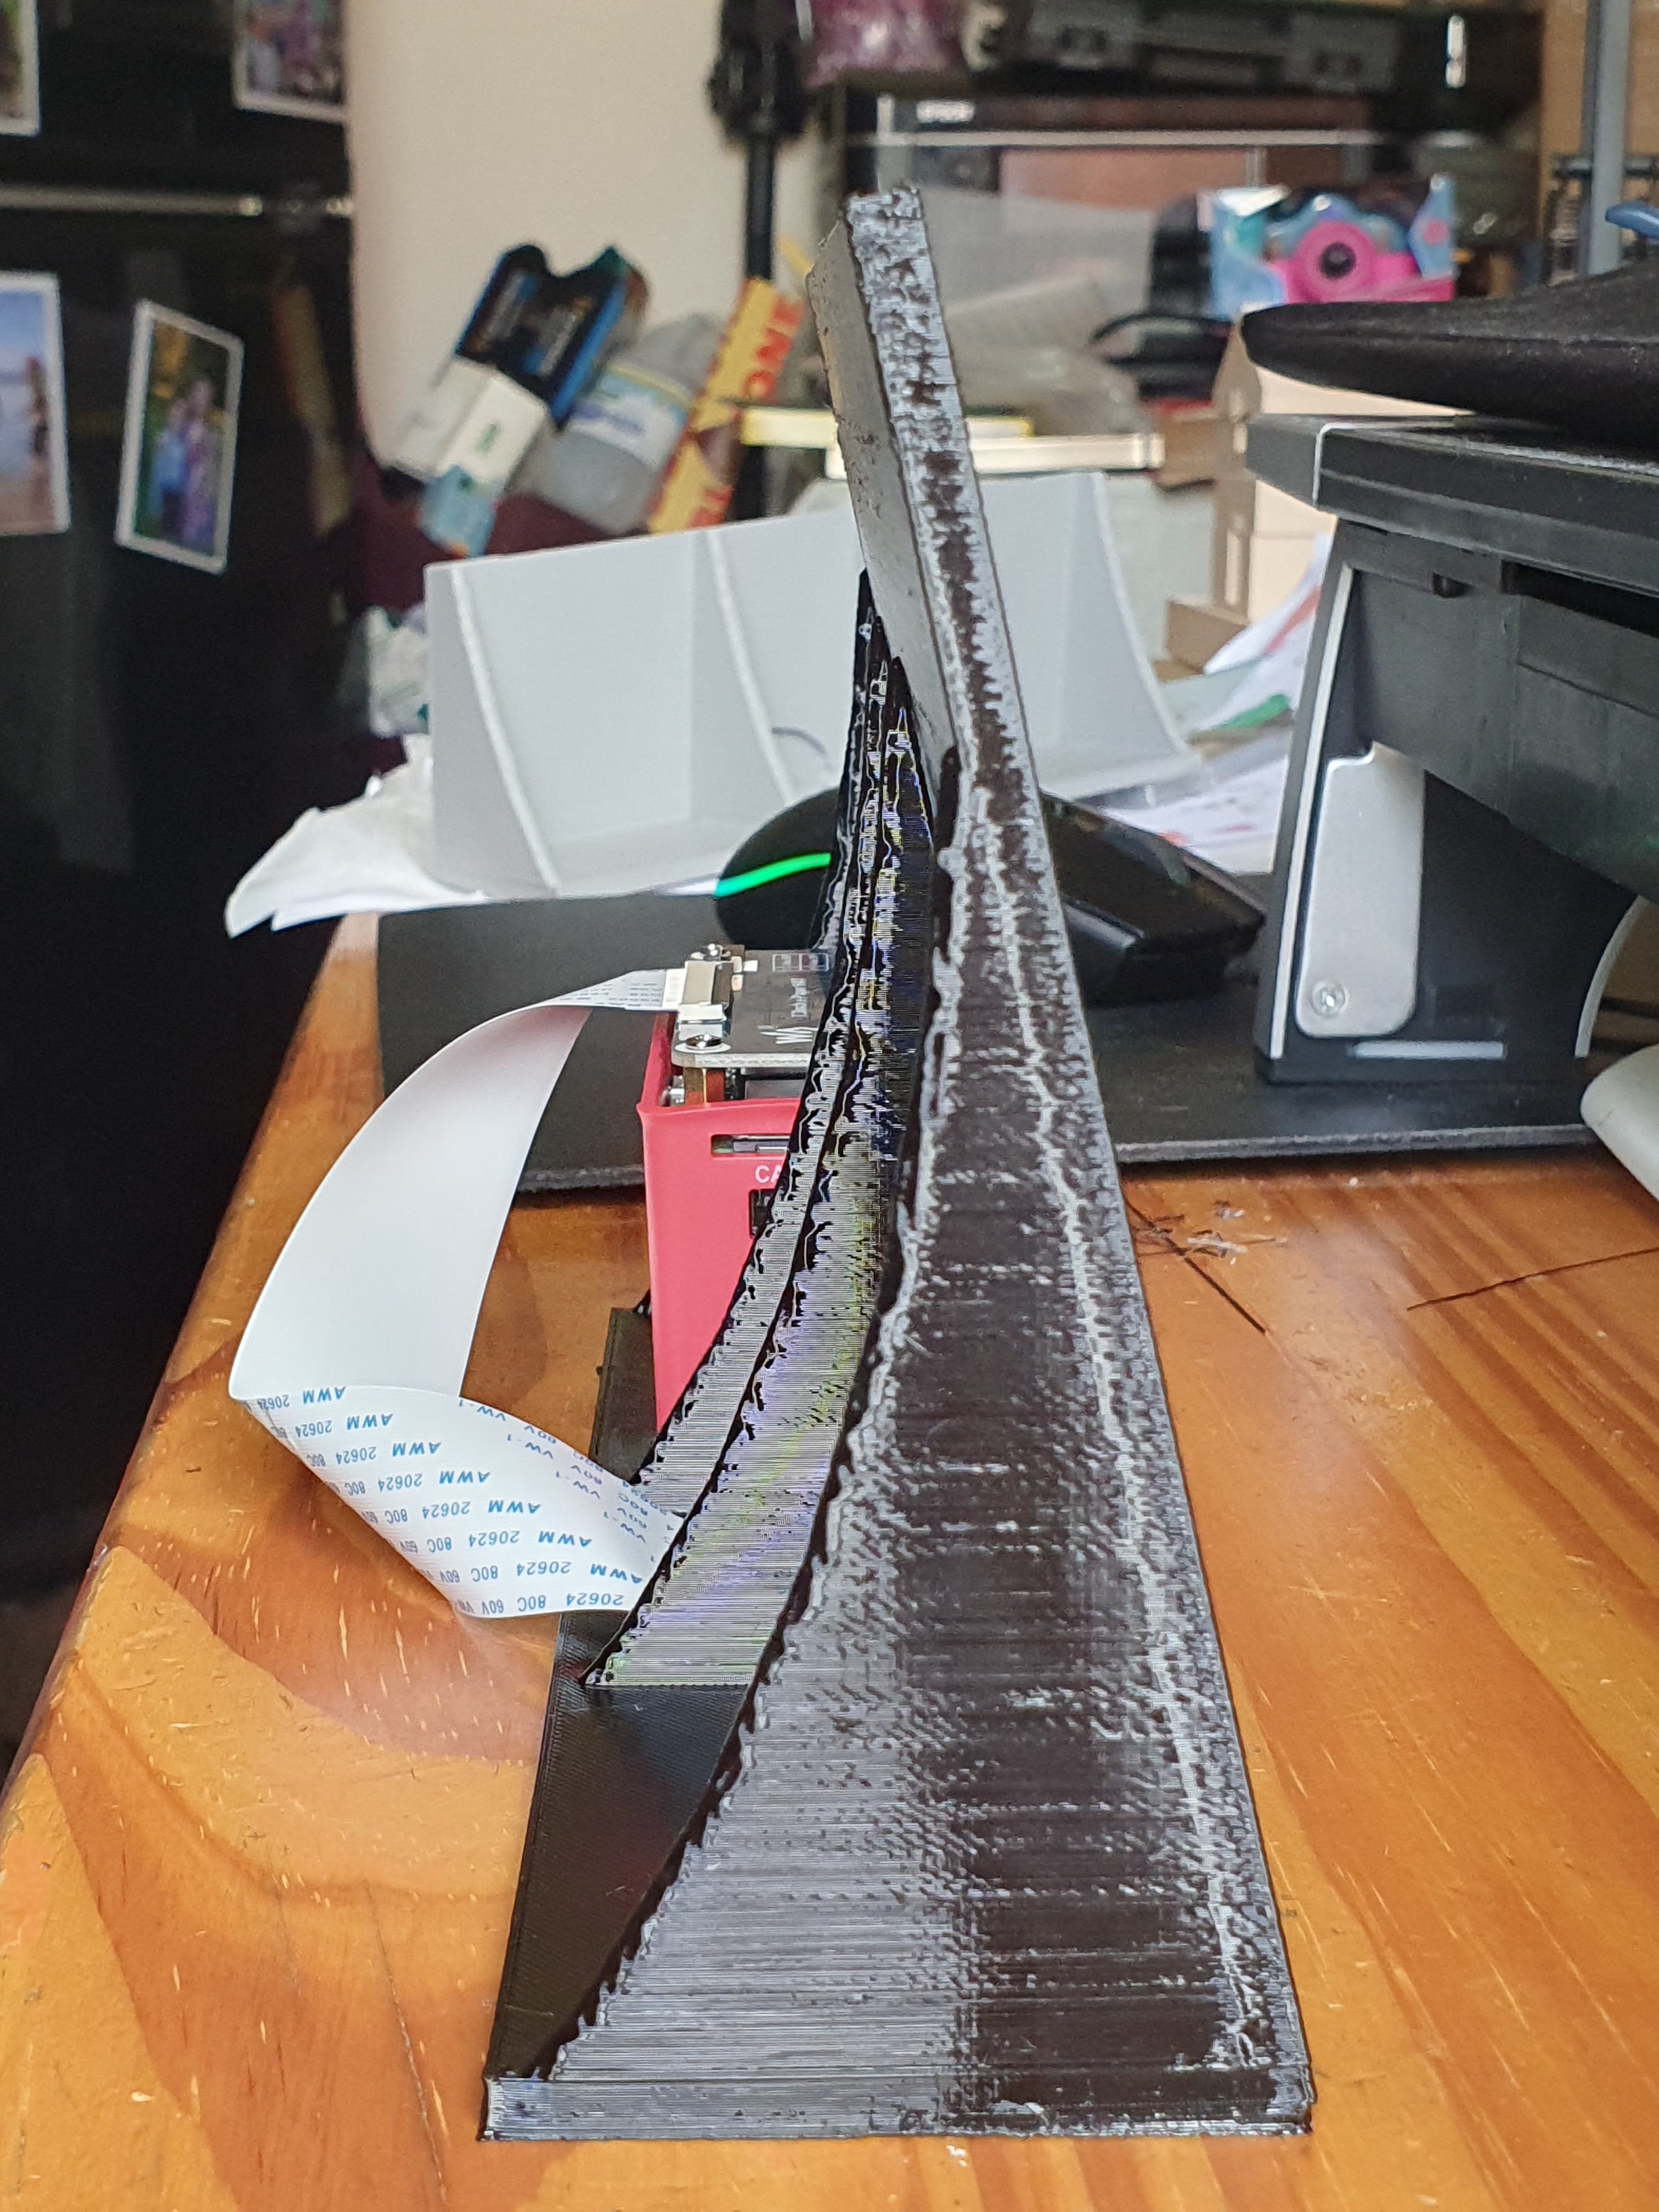
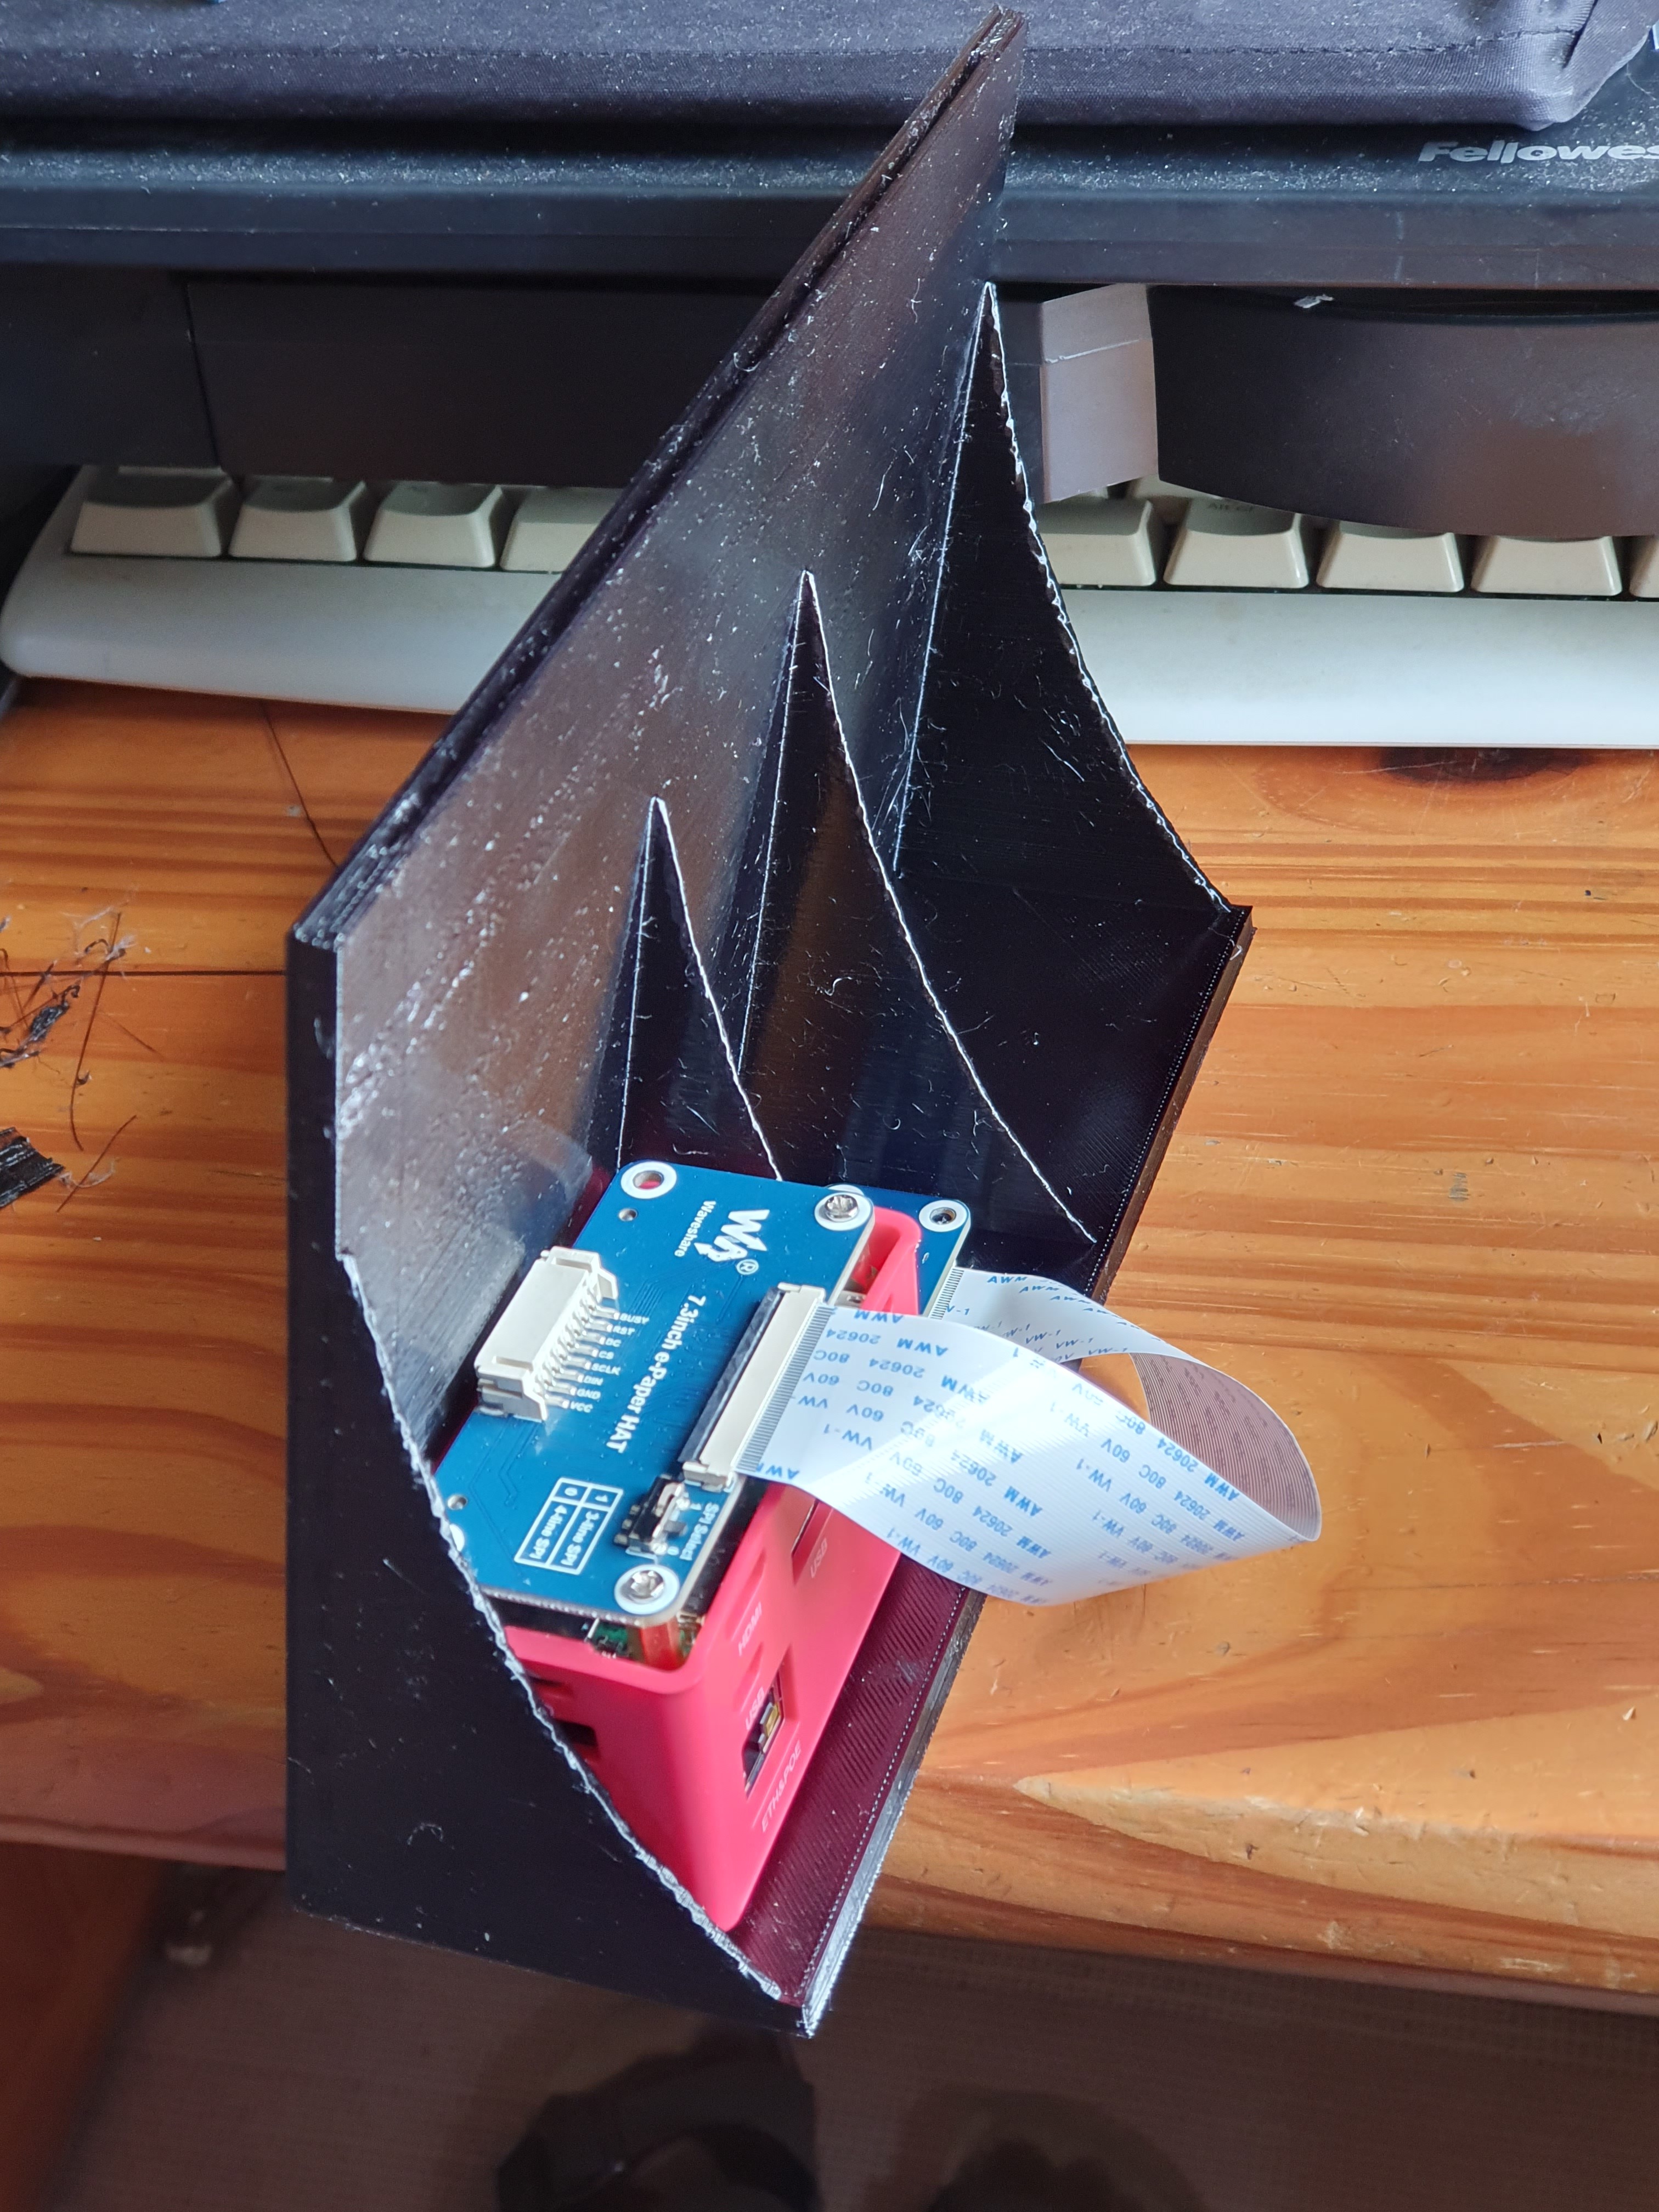
This is the second edition, the one which doesn’t crack the panel .
I chose black PETG for this to get a shiny piano black effect,
unfortunately I didn’t use a high enough temperature as it’s been
two years since I last printed in PETG and I’d forgotten. So it
came out a bit rough … but it certainly does the job and I’ve
uploaded the design to Thingiverse for others to reuse.
The crack in the panel produces display corruption which is very annoying as it’s €86 down the drain, however looking past that I found myself unimpressed with these displays as a dashboard. They don’t ‘pop’ enough due to needing ambient light. If they were trying to attract attention, I don’t think even if emblazoned in red with ‘DANGER’ all over anybody would notice them. The contrast ratio just isn’t there, and you’d need a spotlight shining on them to notice them which kinda defeats the purpose.
Most of my tests work out thanks to plenty of research beforehand. Some do not, and this was one of them. And that’s okay, better to have lost €86 than hundreds of euro had I chosen a bigger edition of this type of display. And I did score a bunch of Pi Zero 2 which albeit expensive, come in a useful PoE package and will be very useful down the line.
I may well be getting another order from Waveshare however. I don’t want to waste my lovely frame, so I might order a black and white e-paper display, something cheap while I also purchase something else I noticed there last time: a USB powered monitor.
Waveshare have a set of curated portable monitors tested to work with the Raspberry Pi’s USB supply. You just need to connect USB and HDMI and voilà, it works, nothing else needed. The portable monitor has a touchscreen, so you can even prod around. I went through all the portable monitors they have, and I believe this is their biggest which can be powered solely by USB:
https://www.waveshare.com/product/raspberry-pi/displays/lcd-oled/10.4hp-capqled.htm?sku=24647
This is a 10.4 inch IPS display 1600 x 720 resolution with 94% of sRGB for around €125 inc VAT. That is expensive, you could get a 15.6 inch touchscreen 1080p portable monitor off Amazon UK for €115 inc VAT. However that would need an additional power supply, and the display would be undoubtedly much less bright.
Anyway all those are decisions for later this week. It has just passed 3am, so definitely time for bed for me.
| Go to previous entry | Go to next entry | Go back to the archive index | Go back to the latest entries |